Last Updated on October 23, 2022

We can dramatically enhance a photograph using the Levels Adjustment Layer in Photoshop. With this adjustment we can improve contrast and brightness.
In Photoshop, this is one of the quickest and easiest ways to improve a dull or wishy-washy photo that’s lacking contrast. The tonal range of an image is the range of pixels from the darkest (black pixels) to the lightest (white pixels). That’s exactly what we can adjust using the Levels Adjustment Layer.
If you need it, you can download a free Photoshop trial from Adobe.
Levels Adjustment Layer
We’re going to use a Levels adjustment layer to edit contrast and brightness. Using adjustment layers in Photoshop means we can come back at any time and re-edit the changes we’ve made.
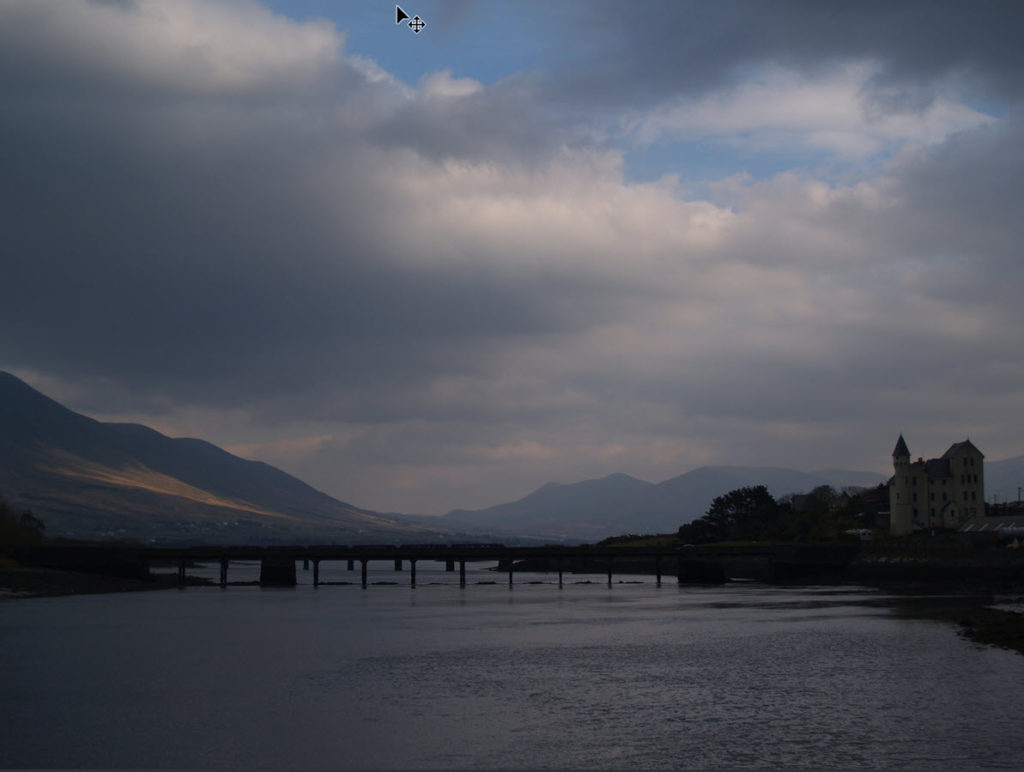
1. Open your photo in Photoshop. The image I’m using is a photograph I took in Co. Kerry in Ireland. I like the moodiness of the image but it’s a little dark and could do with some help. I’m going to brighten it while keeping a good contrast.
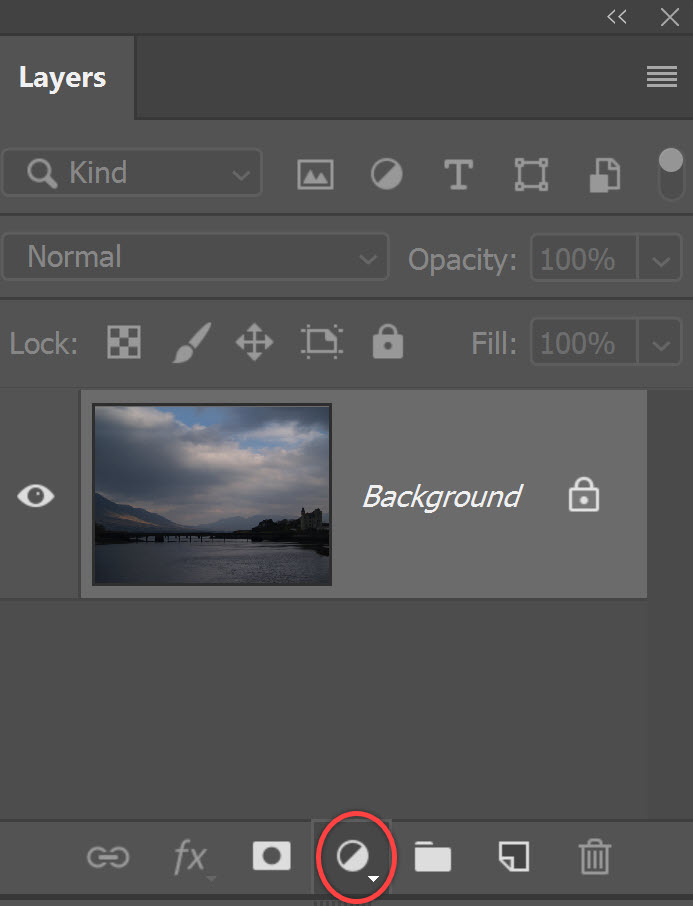
2. In the Layers panel, select the layer that contains the photo that you want to improve.
3. Create a new Levels adjustment layer above the photo layer, by clicking on the Create New Adjustment Layer icon at the bottom of the Layers panel and choosing Levels.
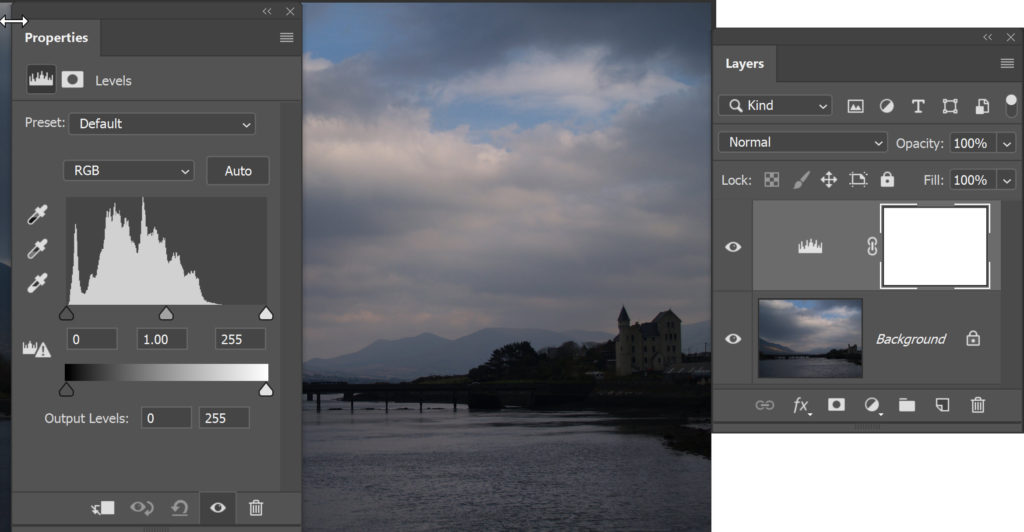
4. The Properties panel opens and you’ll see a histogram showing the range of tonal values in the photo. This panel might look a little bit scary or mathematical, but it’s actually pretty straightforward to use and get quick results.
Note: If you can’t see the Properties panel choose Window > Properties.
The Histogram
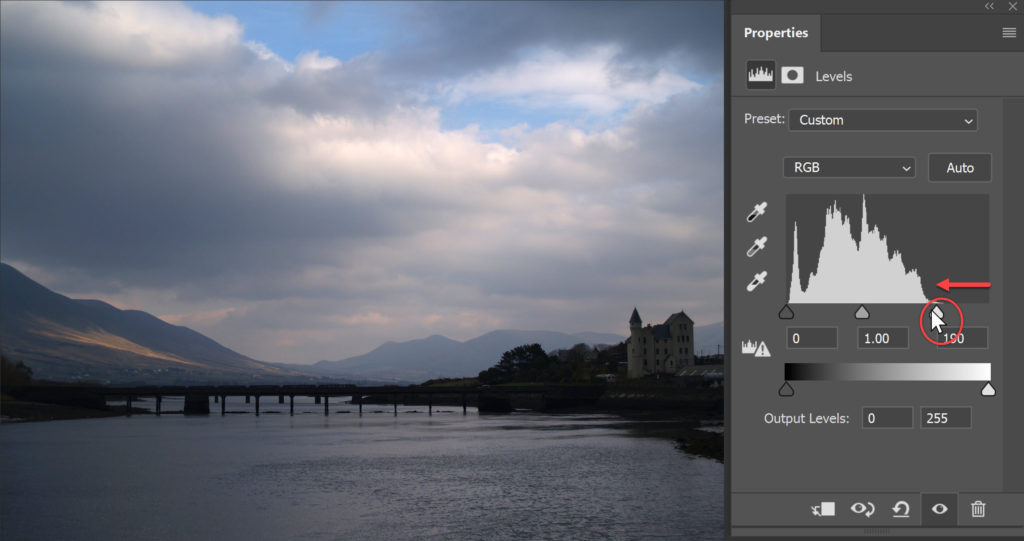
The histogram of the image displays the highlights, mid-tones and shadows information. On the left side, we can see a peak representing the dark pixels. There are several peaks in the middle where the mid-tone pixels are represented. On the right side of the histogram, there are no completely white pixels. We’ll use the sliders to balance the tonal range out.
Some people say that the ideal histogram is one which extends across the full width of the histogram. You can use that as a rule of thumb, but adjusting Levels also allow us to create some cool special effects, so don’t be afraid to play around.
Adjust Highlights
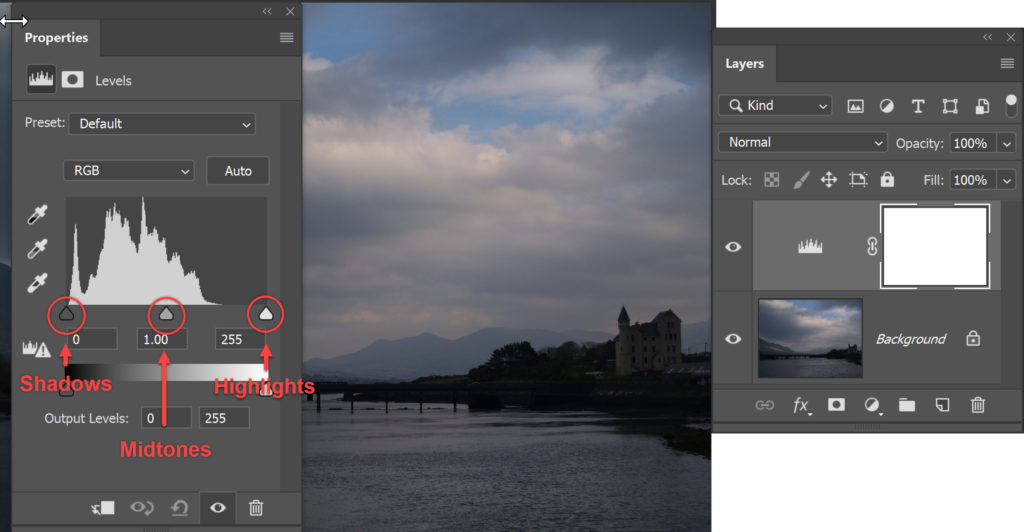
5. In the Levels panel, drag the right triangle (highlights) to the left until it meets the first peak. You will notice that when you drag the slider, the image starts to change. You’ll see that the image brightens as the already light areas become lighter.
Adjust Mid-Tones
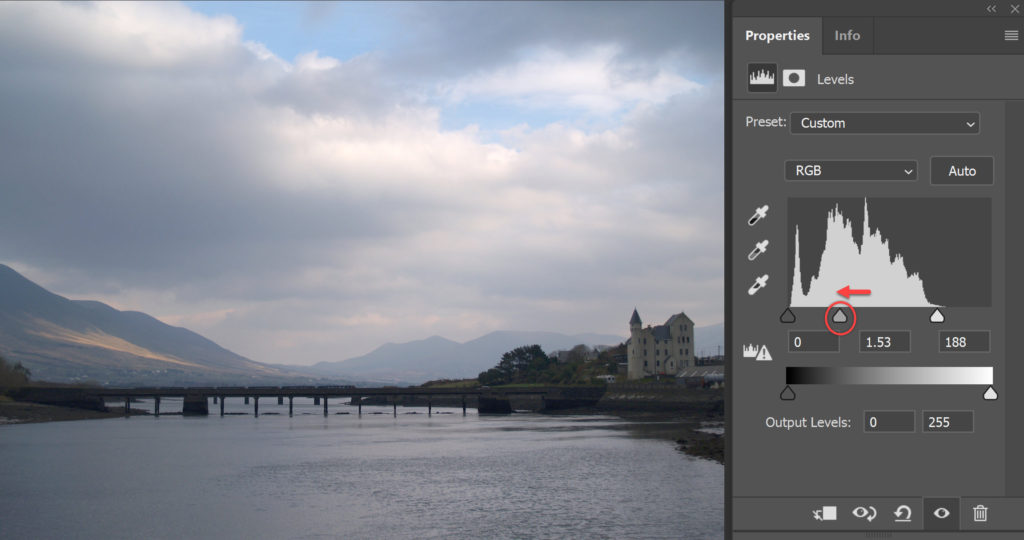
6. Drag the middle triangle a short distance to the left side to lighten the mid-tones. This affects the overall brightness of the image and you’ll see that the photo gets very bright, very quickly. Keep an eye on the changes in the image window and in the Histogram palette graph to determine how far to drag the middle triangle.
Adjust Shadows
6. Finally, we can change the amount of darks in the image by dragging the leftmost triangle (shadows). For this particular photo, the darks are already dark enough, but if you were working with a photograph that was lacking in contrast, this slider will help improve the look by darkening the picture.
7. To see what your picture looked like before and after, click on the small eye icon at the bottom of the Properties panel. This turns the Adjustment layer visibility on and off.
8. Save your photo as a .PSD or .TIFF format. This will retain the Levels Adjustment Layer so you can come back and make adjustments in the future.
You might also be interested in my tutorial on how to improve a dark photo using Camera Raw.
Click Here To Download A Free Photoshop 7 Day Trial
I hope you found this Photoshop tutorial useful and I’d be really grateful if you would share it with your friends or anyone who might find it useful. Thank you!