Last Updated on January 31, 2022
*Updated Jan 2022
The Content Aware Move Tool in Photoshop lets you select part of a picture and move it to a new position. The magic part is that Photoshop fills in the “hole” that is left behind by matching elements from the photograph. This means you don’t need to spend any time make tricky selections followed by “patching up” editing.
Click Here To Download Photoshop Free 7 Day Trial
Here’s a video explanation, or keep reading on for a text based step by step.
There are two modes of use for the Content Aware Move tool:
1 – Move Mode – this is one to go for when the background is similar when placing an object in different locations and the background remains similar in both the original and final location.
2 – Extend Mode – choose this mode when you need to expand or contract objects which are difficult to select such as hair, fur or foliage and trees, or buildings.
Note: I also have a tutorial on how to use the Content Aware Fill command to remove (not just move) a person or object from a photograph.
How To Use The Content Aware Move Tool
Let’s have a look at how to use the Content Aware Move Tool to select part of an image and move it to a new spot on the photograph. I’m using this photo by Raining Huang which you can download for free from Unsplash.
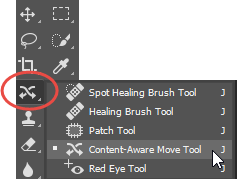
1 – With your photo open in Photoshop, select the Content Aware Move Tool ![]() , which is hidden under the Spot Healing Brush
, which is hidden under the Spot Healing Brush ![]() .
.
2 – On the Options bar you can set up some options to improve the success of moving part of your image. I set the Mode to Move, Structure to 3 and Color to 3:
![]()
Mode – Choose between Move mode to place selected objects at a different location or Extend mode to expand or contract objects.
Structure – Enter a value between 1 and 7. A higher Structure value maintains more of the copied edge pixels.
Color – Enter a value between 0 and 10. A higher Color value provides more color blending.
Transform On Drop – When this option is selected, you can scale the part of the image that you’ve just moved to its new location. You’ll see in the image below that there are resizing handles on the moved part of the image.
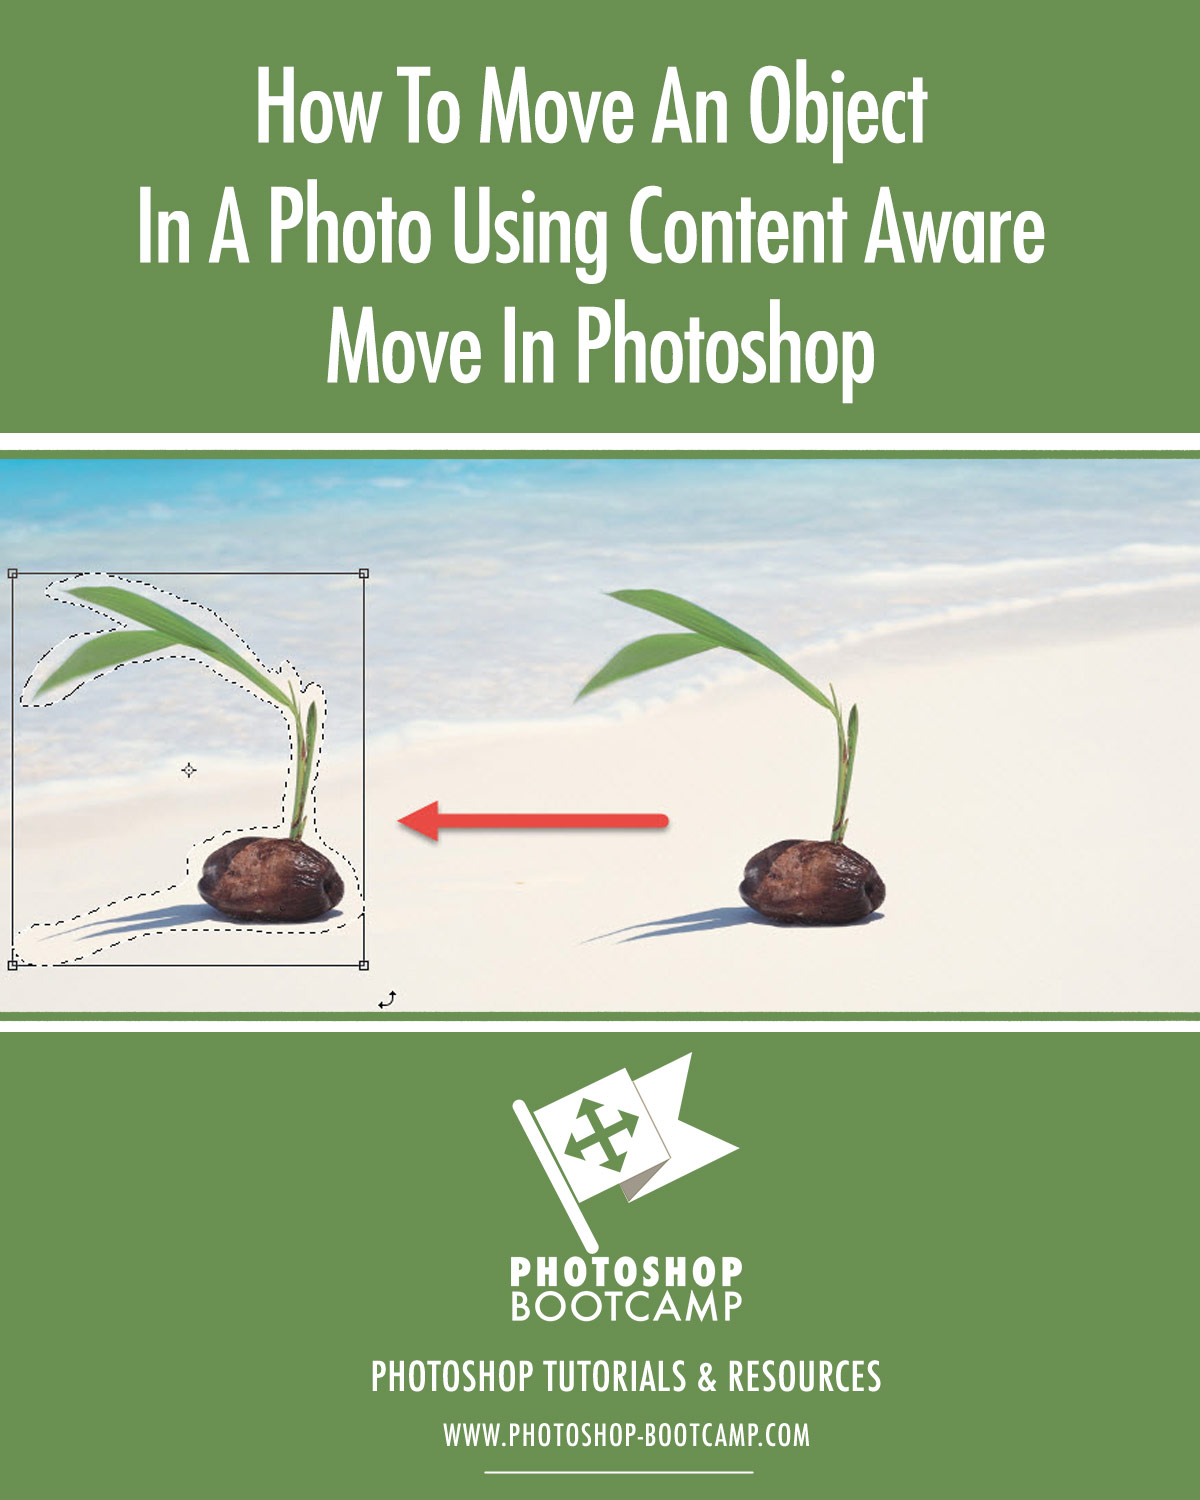
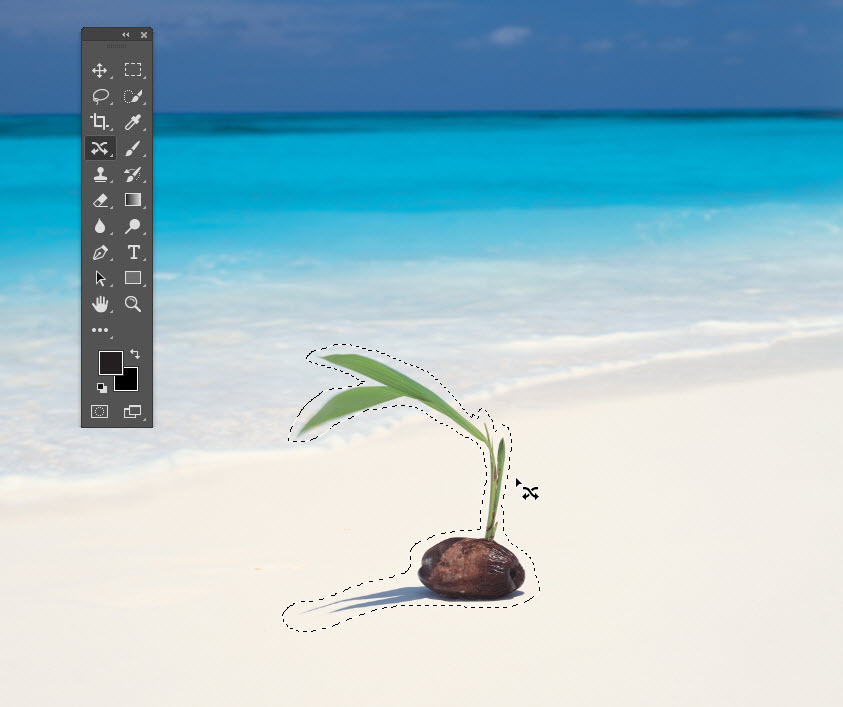
3 – With the Content Aware Move Tool, draw a selection around the object you want to either move or extend. In this example, I’m moving the giant seed from the centre of the picture, over to the left side.
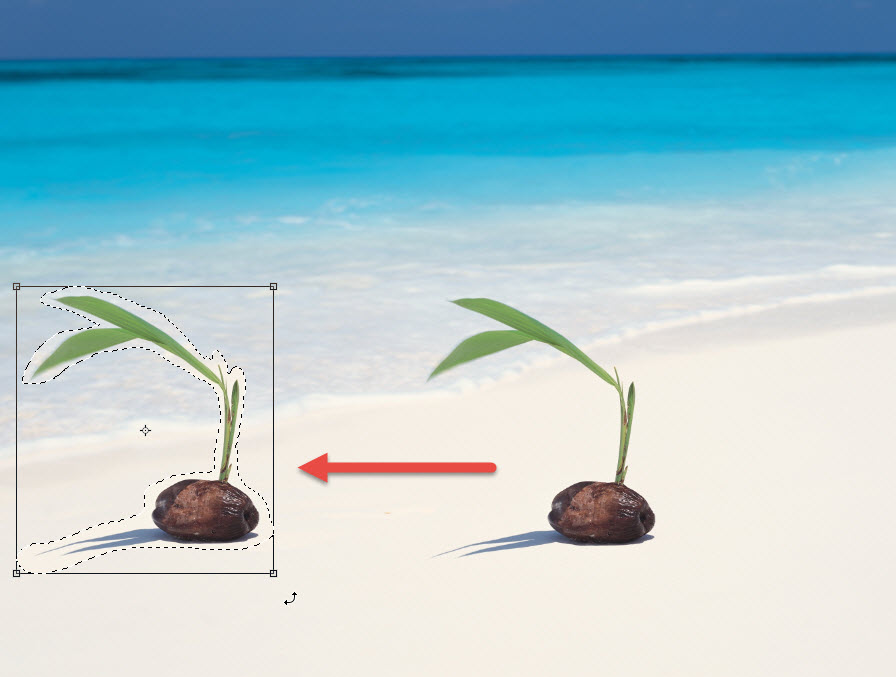
4 – Drag the selection to the area you want to place the object. As you drag you’ll see your the object you selected in its original position and also in its new position.
5 – When you’re happy with the new position, simply hit Enter/Return or click on the Correct tick mark on the Options bar at the top of the screen.

6 – And here’s the final image!

Easy peasy, lemon squeezy.
I’d be very grateful if you would share this post. Thank you!
Pin It!