Retouching With The Spot Healing Brush
Using the Spot Healing Brush tool is a great way to quickly get rid of zits, spots, blemishes and other imperfections from photos. It was a new feature way back in Photoshop CS2 and is now a familiar retouching tool.
The Spot Healing Brush works by sampling pixels from your image and then painting on top of the spot being healed to match the texture, lighting, transparency, and shading. It really does work like magic and couldn’t be simpler to use.
Unlike the Clone or Healing Brush Tool, you don’t need to specify a sample area first. You simply click right on the area where you want to remove a spot or blemish and Photoshop samples from around the retouched area. It is incredible how fast this work. Read on to see it in action.
How To Use The Spot Healing Brush
In this example, I’m using the Spot Healing Brush to remove some orange spots from a butterfly’s wing.
1. Open your photograph in Photoshop. In order to work non-destructively and not damage your image. Make a duplicate of the image on a new layer by pressing Cmd + J (Mac) or Ctrl + J (Windows).
2. In the toolbox, select the Spot Healing Brush tool (J).
3. On the tool options bar at the top of the screen, choose a brush size that is slightly larger than the area you want to fix.
Optional step for Photoshop CC users.
On the tool options bar at the top of the screen, you can see three options:
Content-Aware - Compares nearby image content to seamlessly fill the selection, realistically maintaining key details such as shadows and object edges.
Create Texture - Uses pixels in the selection to create a texture. If the texture doesn’t work, try dragging through the area a second time.
Proximity Match - Uses pixels around the edge of the selection to find an area to use as a patch.
I’m leaving it on the default which is Content-Aware.
4. Using the Spot Healing Brush, click once over the spot you want to remove.
In this example, I’m clicking on the orange spot at the top-right of the butterfly’s wing. Notice that when you press down with the pointer, the shape of the brush will appear black or dark grey. Once you release the mouse button, the area will be “healed” and the spot will disappear.
Clicking On A Spot With Spot Healing Brush
Mouse Released - Spot Healing Brush
5. To change the size of your brush as you work through the spots, use the right square bracket ] to increase the size of the brush and the left square bracket [ to decrease the size of the brush. The Spot Healing Brush works best when the brush size is just slightly larger than the size of the spot.
Here I’ve used the Spot Healing Brush to remove all four orange spots on the butterfly.
And that’s how easy it is to use the Spot Healing Brush. I hope you found this useful and I’d be super grateful if you would share it. Thank you! 🙂
Get A Free Printable Photoshop Toolbar Cheatsheet
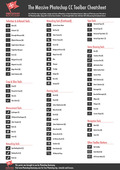
Subscribe now to get a free printable poster showing all of the Photoshop tools and their keyboard shortcut.
Jennifer Farley is an illustrator, designer, author and design teacher based in Ireland. She has been teaching design for over 14 years and helps people learn Adobe Photoshop, Lightroom, Illustrator and graphic design skills to improve their job prospects and their business.