The Crop tool in Photoshop removes or hides whatever part of the image you choose. It’s an essential tool for anyone working with images and is useful for helping to create a focus in your photograph and for removing distractions in an image. With each version of Photoshop, the Crop tool has improved. In this short guide, I’ll show you how to make a basic crop on your image and some of the options you have available to you when you’re cropping.
How to use the Crop Tool In Photoshop
1. Choose the Crop tool by pressing C on your keyboard, or by clicking on the Crop tool in the toolbox. ![]()
2. You’ll see that a cropping border is automatically added to your photo. You’ll also notice there are handles (small boxes) in each corner and along each side. Simply grab a handle and start to drag.

Notice the dimmed area that appears outside of the cropping border. This is the bit that will get cropped away.
If you want to keep the proportions of your crop to be the same as your original image, press and hold the Shift key as you drag the cropping handles. You can also move your image within the cropping area by clicking on the image itself and dragging it.
3. When you’re happy with how the crop appears, you confirm or complete the crop by either Enter (PC) or Return (Mac) on your keyboard, or by pressing the Confirm Crop icon in the Options bar at the top of the screen.

Et Voila! Your beautifully cropped image appears.

How to Cancel A Crop
Stepping back a little, if you want to cancel a crop while the cropping border is still on your image, you can either press Esc on the keyboard or, click on the Cancel Crop icon in the Options bar at the top of the screen.

If you’ve already committed or confirmed a crop, just undo by pressing Cmd + Z (Mac) or Ctrl + Z (PC). That will take you back one step.
Other Crop Options You May Like To Use
When you start to drag with one of the cropping handles, The Rule of Thirds overlay grid appears by default. If you like to adhere to the Rule of Thirds with your photography, this is very useful, but there are other Overlay Options available too. Here’s how to find them.
1. On the Options bar at the top of the screen, click on the Set The Overlay Options icon. A dropdown box appears showing you the various overlays which will appear when you start to drag the crop handles. You can cycle through the options by pressing the letter O.

Here’s a visual overview of each:
Grid Overlay

Diagonal Overlay

Triangle Overlay

Golden Ratio

Golden Spiral

Finally, on the overlay options, there are three other settings in the menu:

- Always Show Overlay – once you start cropping, it’s visible and stays visible
- Never Show Overlay,
- Auto Show Overlay – it only appears when you’re actually cropping
Freehand Cropping in Photoshop
We’ve just seen how to do the most basic crop i.e. click on the tool, the crop borders appear on your image and then you drag the handles. However, you can also just select the Crop tool and simply drag over the area you want to crop. It doesn’t matter that there is already a cropping border around the image, you can just click and drag out then release the mouse. Your new cropping area will appear and if you need to adjust it you can use the handles as before.

So that’s the fundamentals of cropping. There are other tricks you can perform with the Crop tool and we’ll return to it at another time.
Thanks for reading! I hope you found this useful and I would be very grateful if you could share it. 🙂
Pin This!
Get A Free Giant Photoshop CC Tool Cheat Sheet

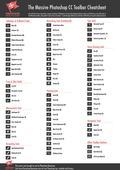
Sign up for my Photoshop newsletter and get a free, instantly downloadable PDF poster of the Photoshop CC Toolbar Cheat Sheet. It has all the tool icons and all the shortcuts you need to know to speed up your Photoshop workflow.

Recent Comments