Physical Address
304 North Cardinal St.
Dorchester Center, MA 02124
Physical Address
304 North Cardinal St.
Dorchester Center, MA 02124
Last Updated on October 22, 2022
When you’re creating a new file in Photoshop you need to consider how the file might be used.
Will the image be printed in a magazine or book? Will it be used as a graphic on a website or screen?
In this quick guide, you’ll learn how to start a new file from scratch and how to use starter templates.
Click Here To Download Photoshop Free 7 Day Trial
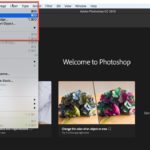
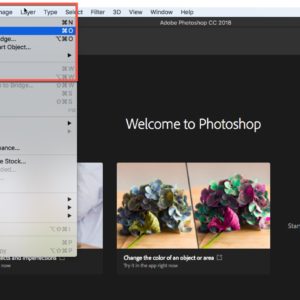
To create a new document in Photoshop, we use the New Document dialog box. There are several ways to get to this dialog box.
1. Click File > New on the Menu Bar along the top of the screen.
OR
2. Use the keyboard shortcut, Cmd + N (Mac) / Ctrl + N (Win). This is a handy keyboard shortcut that we use over and over when working in Photoshop, so it’s worth making an effort to remember it.
OR
3. From Photoshop’s Home or Start screen, Click on the New… button on Photoshop’s Start screen.
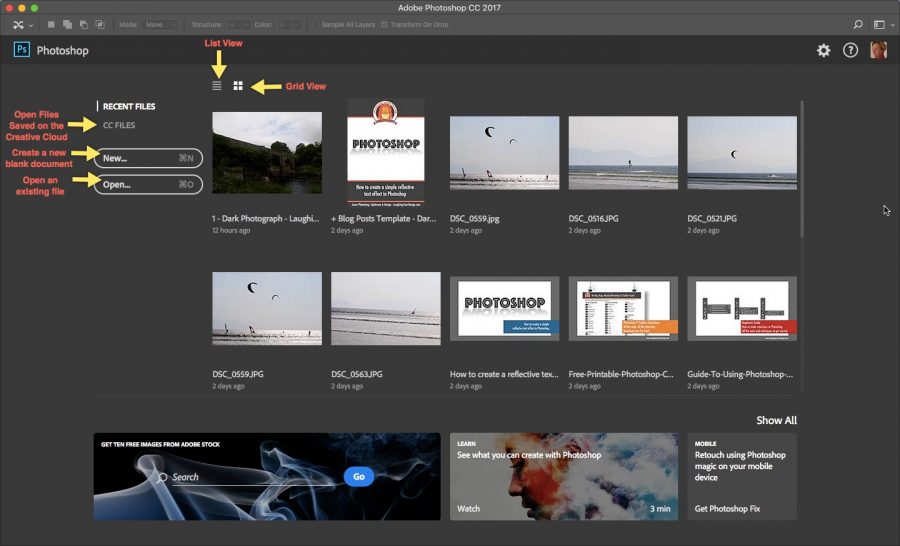
Any of these options open up the New Document dialog box. (see below)
Type in the Width and Height of your document and the Resolution. For screen-based graphics a resolution of 72ppi is standard and for print graphics, a higher resolution of 300ppi is standard.
Choose a Colour Mode. For screen-based graphics RGB is the standard and for print images CMYK is the standard.
Click Create and your new file will open.
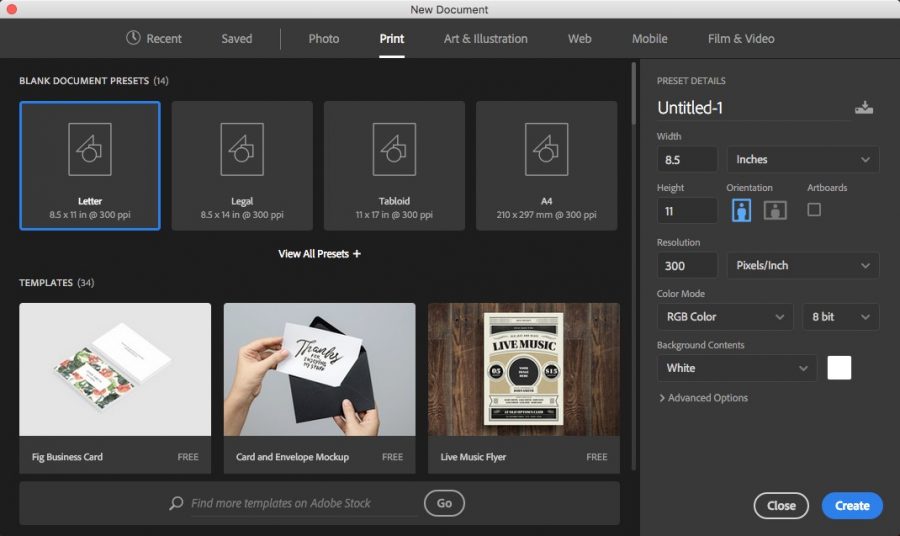
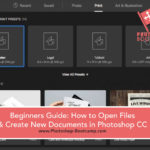
Along the top of the New Document dialog box, you’ll see a row of categories – Recent, Saved, Photo, Print, Art & Illustration, Web, Mobile, and Film & Video.
By default, the Recent category is selected and you will see a grid of document sizes that you’ve used recently. If this is the first time you’ve opened Photoshop, or if you have reset Photoshop to factory settings, there will be nothing in this category.
A handy time-saver when creating new files is to use a preset. A preset is simply a setting of width and height dimensions, a choice of portrait or landscape orientation, resolution and colour mode. There are other options but these tend to be the ones we are most likely to be interested in.
1. To choose a preset, first, pick the type of document you want to make, for example, is it for use on the web or on a screen, for use in print, a photo? Click on that category name along the top. For this example, I’ve chosen Print.
2. A set of four presets appear in the dialog box. Click on the View All Presets + link to see more presets.
Now we can see an extra bunch of thumbnails representing various Print presets. Use the scroll bar along the right to scroll through them.
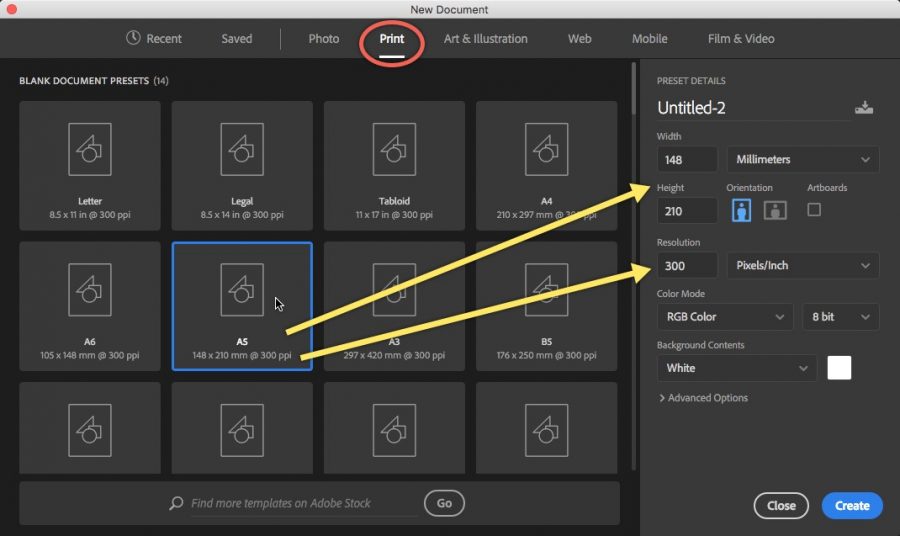
3. Click on the A5 preset. Notice how the Preset Details such as width and height change on the right-hand side.
4. If you’re happy with this preset, click Create. The New Document dialog box closes and your brand new document opens in Photoshop.
Let’s say that you want to make a document at a size that is not already available as a preset. Here’s how to add your own custom settings.
1. Choose File > New in the Menu Bar along the top of the screen. The same New Document dialog opens as before.
2. On the right-hand side, in the Preset Details section, type in the values 10 inches for width, 3 inches for height and change the colour mode to CMYK. We change the units of measurement by clicking on the drop-down box to the right of the Width field.
Now, let’s say that we know this is a document size that we may want to use again, it’s a good idea to save it as a preset.
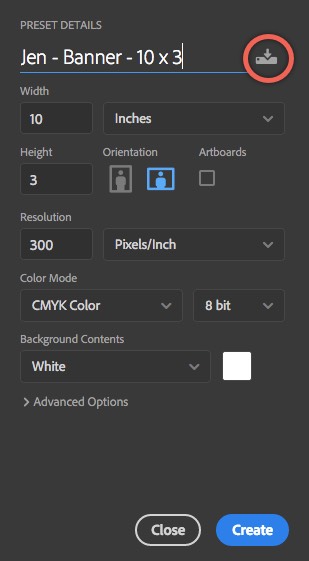
3. Click the Save Preset icon (circled in red).
4. Give it a name by typing in the Preset name field at the top. (It will say something like Untitled initially). Give it a descriptive name to make it easier for yourself to remember what the preset is. I called mine Jen – Banner – 10 x 3.
Then click Save Preset again.
The new saved preset now appears in the Saved category. This means you can come back to it at any time and it will speed up your workflow by not having to type in the values each time you want a document of that size.
5. Click on the Create button and your new file opens in Photoshop.
And that’s how you make a new document in Photoshop. Note: You DO NOT have to save your preset every time.
1. Make a new Photoshop document suitable for web use (hint: color mode will be RGB and Resolution will be 72 Pixels/Inch). Set the size to 1000 pixels wide by 1000 pixels high.
2. Make a new Photoshop document suitable for print use. (Hint: Color mode will be CMYK and Resolution will be 300 Pixels/Inch). Set the size to 8 inches wide by 10 inches high.