Physical Address
304 North Cardinal St.
Dorchester Center, MA 02124
Physical Address
304 North Cardinal St.
Dorchester Center, MA 02124
Last Updated on October 28, 2022
Super Zoom lets you enlarge part of a photo by zooming in, cropping and letting Photoshop work its magic by adding extra pixel data to make up for any loss of detail and resolution. This all happens in one handy panel.
Super Zoom is one of a number of Neural Filters in Adobe Photoshop which uses the Adobe Sensei AI.
Click Here To Download Photoshop Free 7 Day Trial
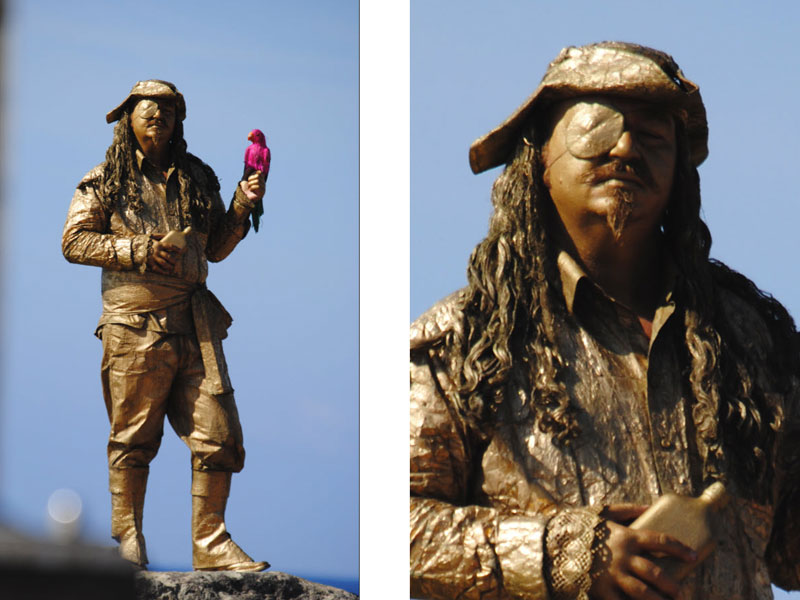
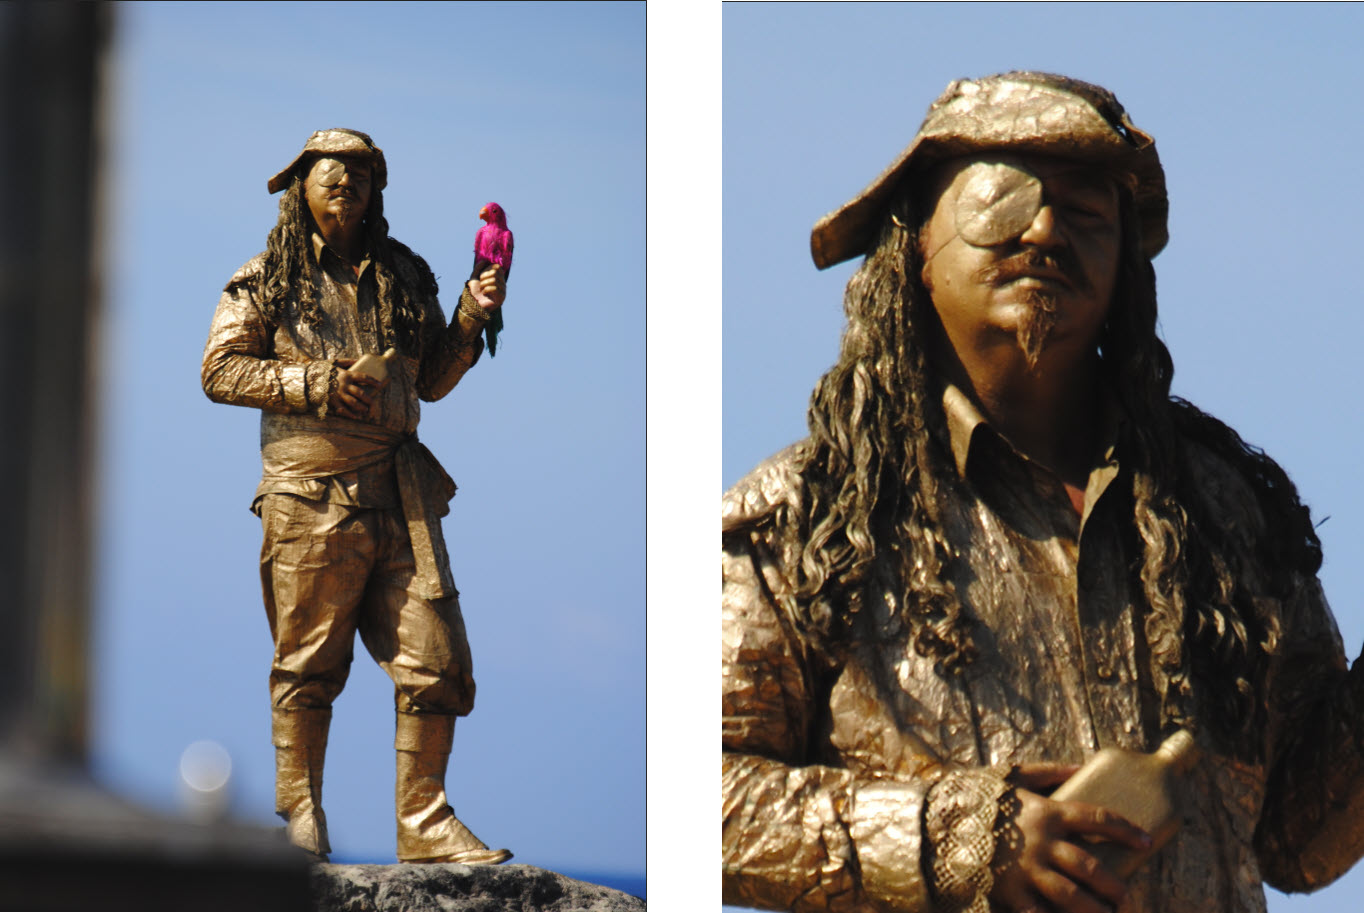
Open the image in Photoshop that you want to work on. I’m using this one, of a living statue.

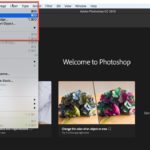
From the main Photoshop Menu at the top of the screen choose Filter > Neural Filters.
The Neural Filters panel opens on the right-hand side of the screen. You’ll see a number of filters listed. Toggle the Super Zoom filter on. If you have not used this filter before, you’ll need to download it first. Photoshop will tell you if you need to download it and you’ll see a download button if that’s the case.
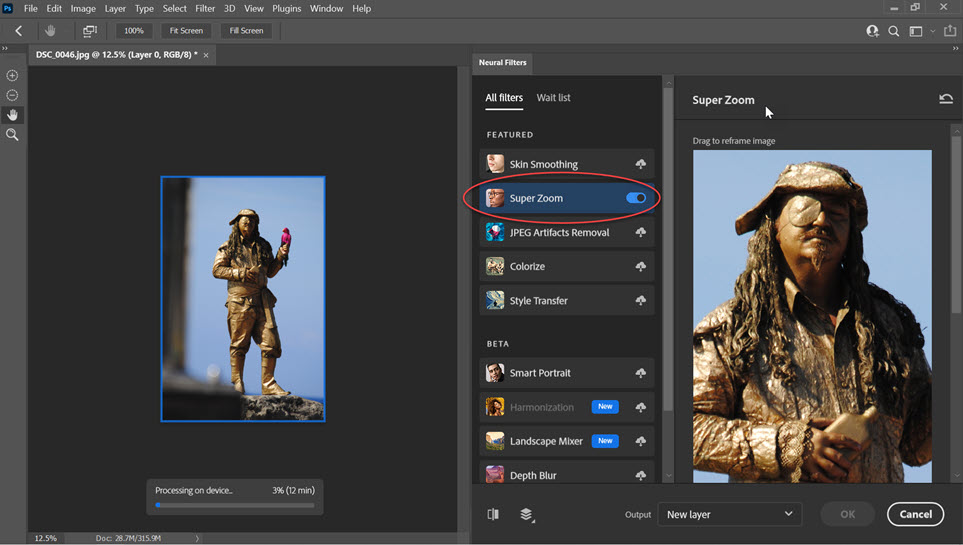
Zoom in to magnify the part of the photo you want by pressing the + (plus) magnify button beneath the Super Zoom preview. I set mine to x3 magnification.
You can use the hand tool (which appears automatically when you put your cursor over the preview image) to move the selected area around.
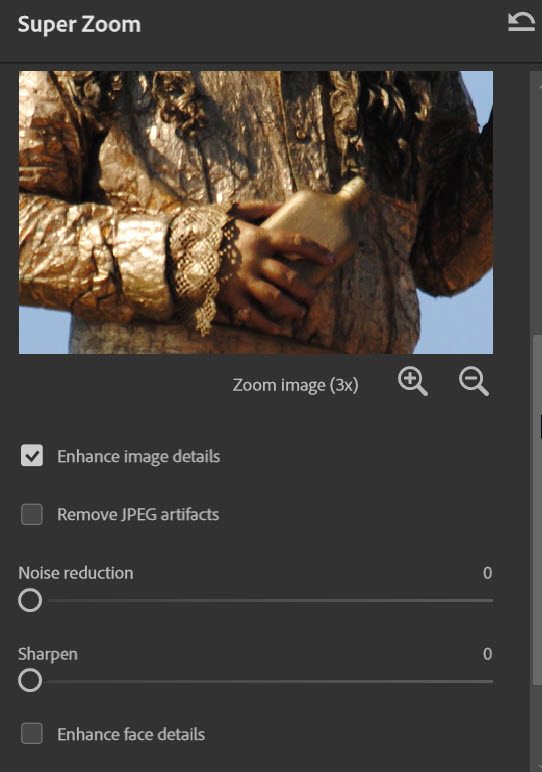
There are a few options here to help you improve the image quality of your super-zoomed photo.
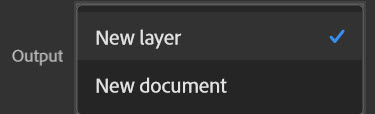
After you have selected the options that give the best image quality, select the Output at the bottom of the panel.
You have a choice of putting the zoomed image on a new layer or into a new document. I chose New Layer.
You will notice that Photoshop is chugging away, processing the result. It does take some time and if you go back and change any of the options listed above, it starts processing all over again. So you might need a cup of tea while you’re waiting.
6. Click OK.
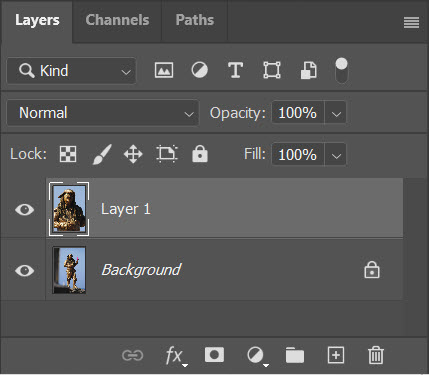
The new zoomed version now appears on a layer above your original background layer.
Here’s a comparison of the two layers. On the left, you can see my original photograph, and on the right, you can the new layer which has had Super Zoom applied.
Overall, this is a great new feature that I imagine will only improve with each version of Photoshop.
With this form of image interpolation and re-sampling, the greater the magnification applied, the more pixels need to be added by Photoshop. This can result in a somewhat dodgy-looking image.
However, there is great potential here and it does work very well with some images.
It helps to begin with the largest or highest resolution image you can.
If you start with a small photo, the resulting magnified image will not look as good as hoped because Photoshop has too much extra pixel data to add.
I hope you found this useful, please share it!