Physical Address
304 North Cardinal St.
Dorchester Center, MA 02124
Physical Address
304 North Cardinal St.
Dorchester Center, MA 02124
Last Updated on July 24, 2020
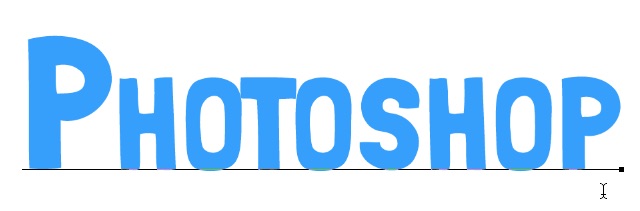
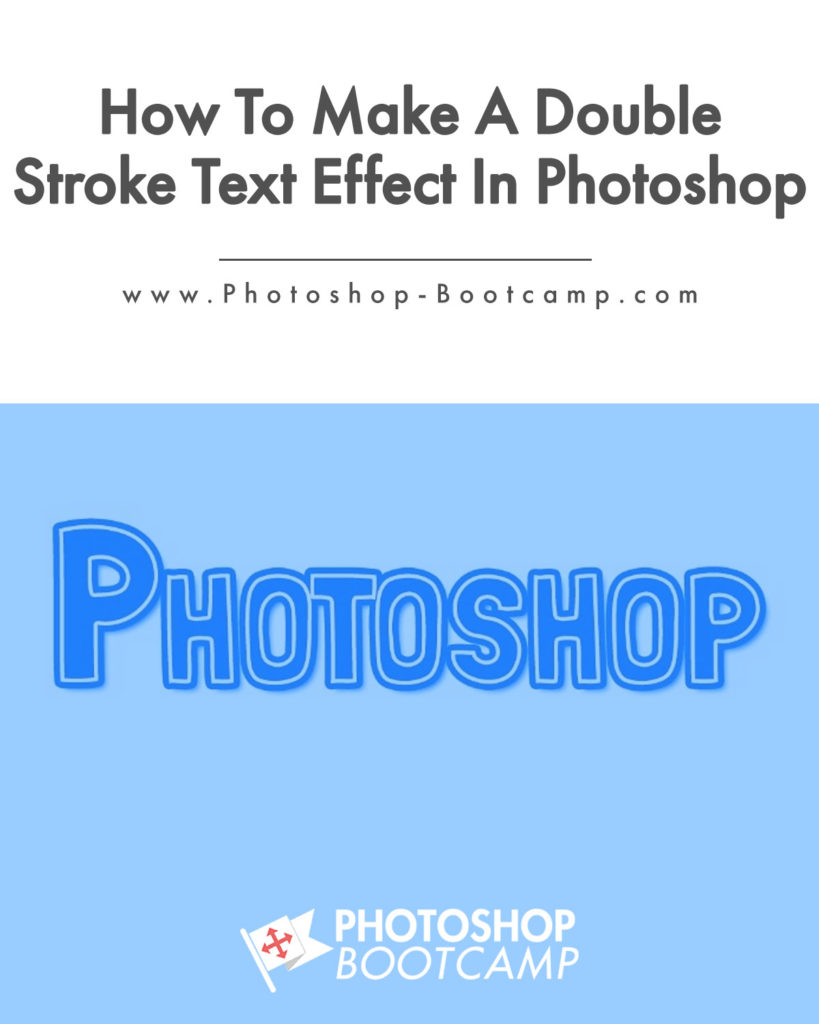
In this quick Photoshop tutorial for beginners, you’ll learn how to use Photoshop’s Layer Styles to create a simple and eye-catching double stroke text effect. Here’s what we’ll make:

The Layer Styles or Layer Effects in Photoshop allow you to easily add effects such as Drop Shadows, Glows, Stokes, Colour Overlays and more to any layer. By combining effects within the Layer Style dialog box you can create interesting looks which can be applied to text, shapes, blocks of colour and so on. In older versions of Photoshop, you could only add one Drop Shadow, one Stroke and so on. However, a new feature in Photoshop CC allows us apply the same effect more than once and that’s what we’re going to do now. You’ll add two strokes to the same piece of text to create a cute text effect. Here’s how to do it!
1. Create a new blank file in Photoshop with a size of 1000 x 500 pixels. For this example, we’re creating a simple graphic for web use, so set the resolution to 72 ppi. If this graphic was required for print purposes, you would set the resolution to 300ppi.
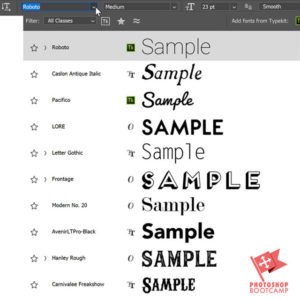
2. Now to add some text to your new document. I’m using a free font I love, called Folk. You can download it here. You can use any big fat bold font for this exercise, but this text effect works extremely well with a heavy hand-drawn font like Folk.
Select the Type tool by pressing T on the keyboard, or click on the Type Tool on the Toolbox. ![]()
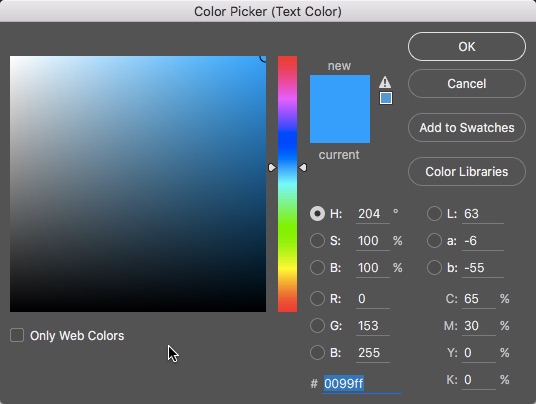
3. In the Options Bar at the top of the screen, set the type size to 280 pt (you may need to make this bigger or smaller if you’re using a different font). Set the colour to bright blue - Hex #0099ff.

To change the font colour, just click on the colour swatch on the Options Bar and the Colour Picker opens automatically.
Once you’ve set your options, click once on your document and type in some text.
When you’re finished adding text, either click on any other layer in the Layers panel or click on the Commit button ![]() on the options bar.
on the options bar.
5. Now you’ll add the strokes to the new text layer you’ve just created. Click on the Type layer to make sure it’s selected, then click on the Layer Effects icon at the bottom of the Layers panel. A drop-down menu will offer lots of different effects, click on “Stroke”.
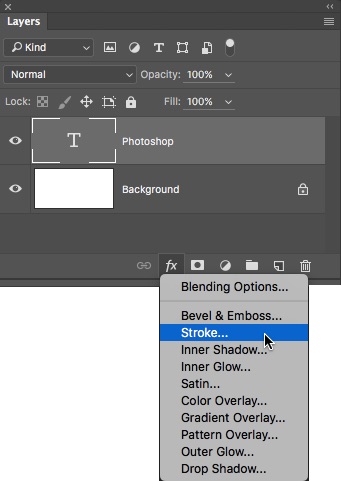
6. The Layer Effects dialog box opens and will show options for adding a stroke to your layer. Make sure the Preview checkbox is clicked so you can see your changes as you make them.
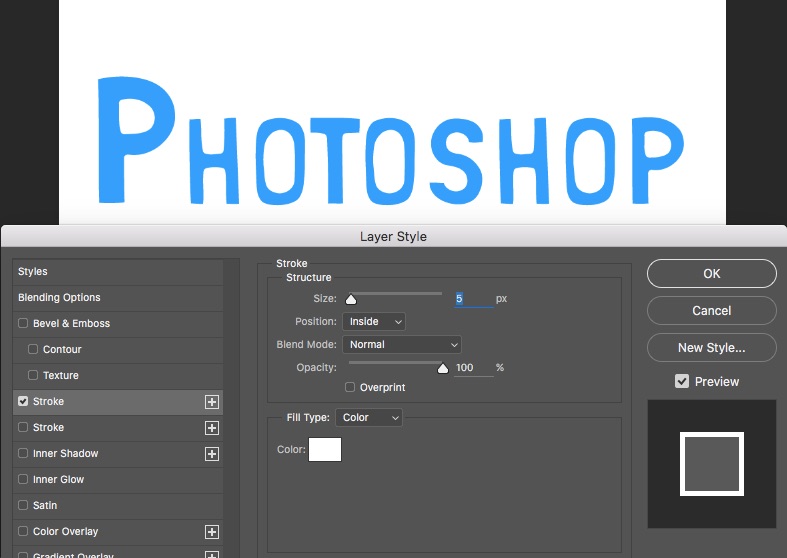
Now it will look as though your text has gone a bit weird because it’s sitting on a white background and you’ve added a white stroke around it. Next, we’ll add another stroke and it will look much more interesting.
7. Click on the word Stroke on the left-hand side of the Layer Style box, underneath the Stroke you’ve just added (which will have a tick in the checkbox).
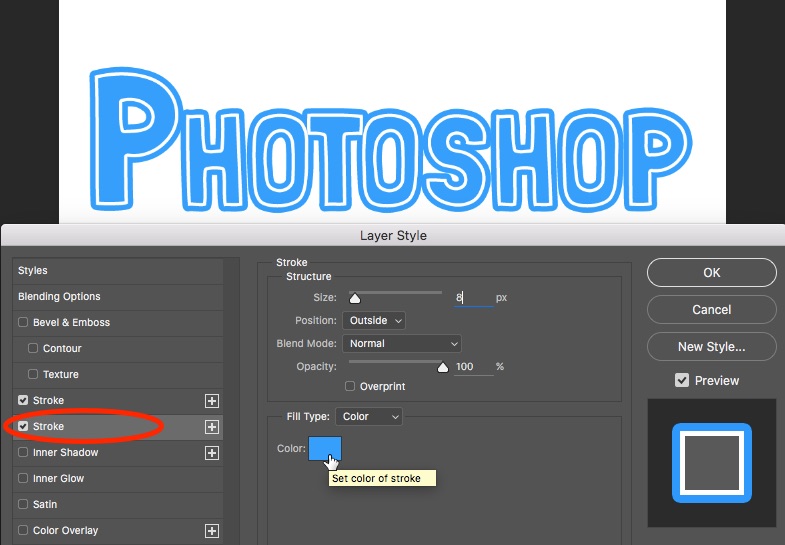
We could finish this effect at this stage, it looks nice, but I want to show you how to continue in the Layer Style box to add a drop shadow.
8. Don’t click OK yet. Click on the word Drop Shadow in the bottom left-hand side of the Layer Style box. You’re going to add a subtle shadow in the same colour as the text, but with just enough drop shadow to lift it slightly off the page. Now you’ll see the drop shadow options.
Blend Mode is Multiply by default, but if it’s not currently set to Multiply, change it in the drop-down menu.
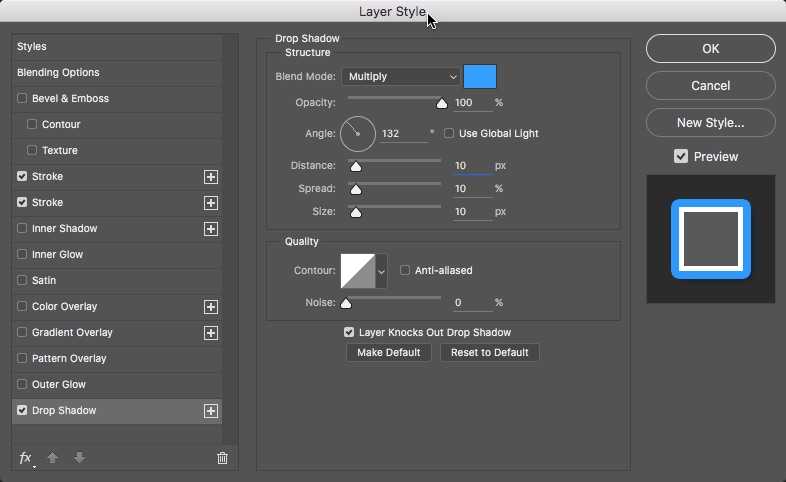
Click OK. Your text effect should look something like this:
The really cool thing here is, your text can still be edited as normal and the double stroke will be applied instantly. As I mentioned earlier, this effect works well with chunky hand-drawn style fonts but you can create interesting effects using these styles with any font.
I hope you found this Photoshop tutorial useful and I’d be really grateful if you would share it. Thank you very much! 🙂
Instructor
Hi I’m Jennifer.
I am an Adobe Education Trainer and have been teaching Photoshop, Illustrator and InDesign for over 15 years.
I also work as an illustrator and designer so as well as helping people learn Photoshop, I also use it everyday for my own work.
One of the best ways to improve your skills and speed up your workflow in Photoshop is to use keyboard shortcuts. This giant, printable cheat sheet shows all of the shortcuts for every tool in the toolbox.
Join over 1500 Photoshop beginners and improvers who have signed up to the Photoshop Bootcamp newsletter. Get Photoshop tips and tutorials delivered right to your inbox.
![]()