*updated November 2020 *
It’s easy to add text to an image in Photoshop. The Type tool is powerful and is used to add text to images in a few different ways. So exactly do we use it? Here’s a quick answer:
To add text to an image in Photoshop we can do any of the following:
- Select the Type tool (press T), click once on the image, then type whatever you want. This is known as Point Type.
- To add a Paragraph of text, select the Type tool (T), the click and drag out a rectangle or bounding box. Then either start typing, or paste in some copied type. Paragraph type will wrap inside the bounding box.
- To add type Type On A Path or Shape, first, draw a path with the pen tool, or draw a shape with one of the shape tools. Then select the Type tool and click on the path.
Follow along in this step by step tutorial and I’ll show you how to work with the Type tool to add text, edit it and add a few other design elements to your image.
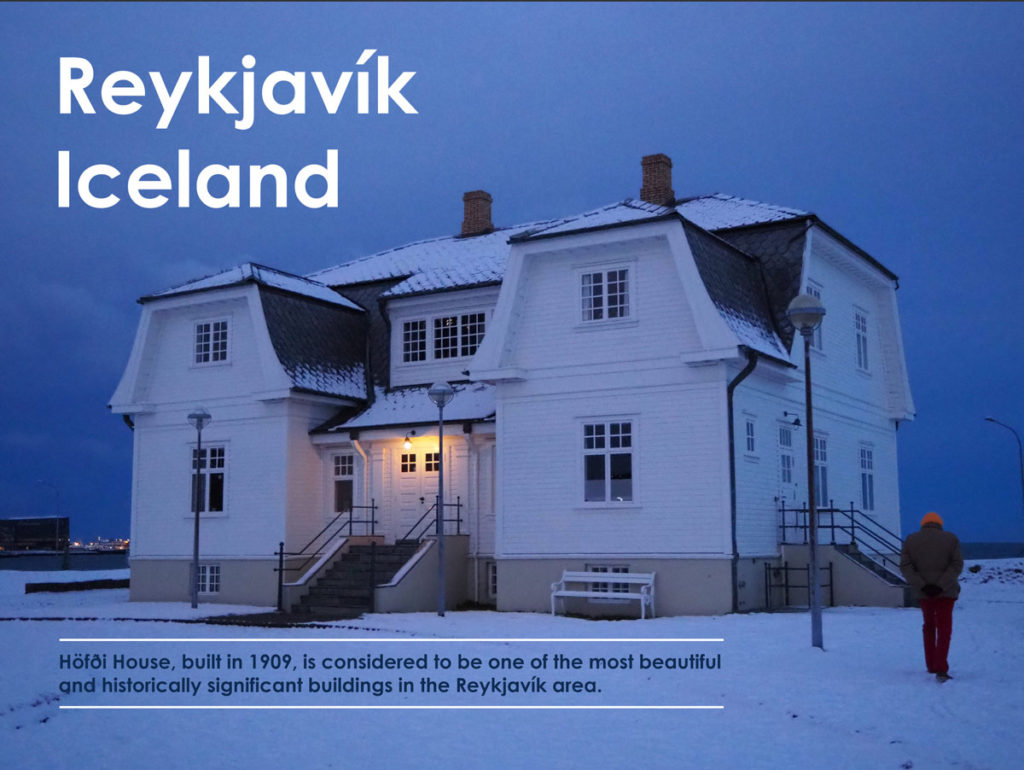
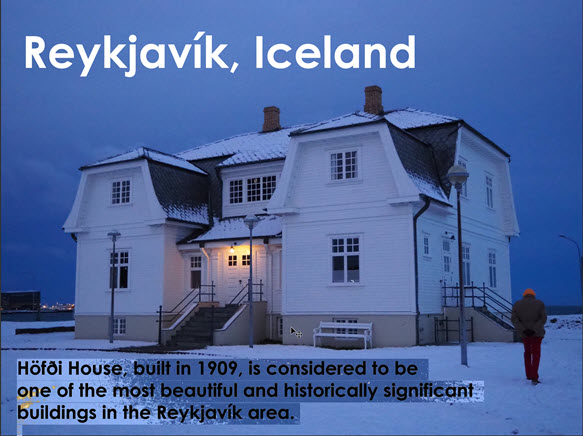
Here’s what we’re going to make in this tutorial.
If you don’t already have a copy of Photoshop, you can get a free Photoshop trial here.
How To Add Text To An Image With One Click In Photoshop
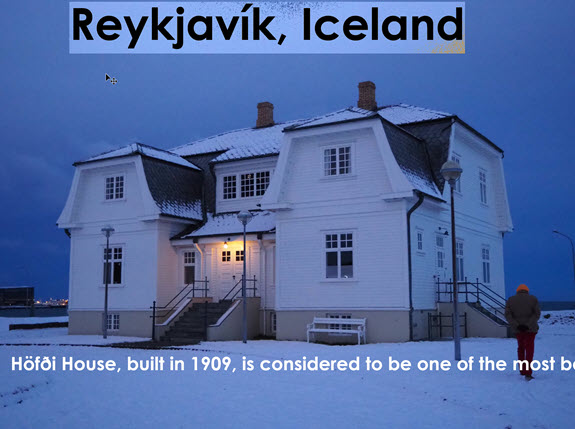
1 Open an image that you want to add some type to. This is a picture I took of Höfði House in Reykjavík.
2. In the toolbar, select the Horizontal Type tool or press T on the keyboard to select it. The cursor changes to the Type cursor.

3. You can set up the formatting for your text before you add the type, or you can change it after.
For this example, lets set up the formatting first.
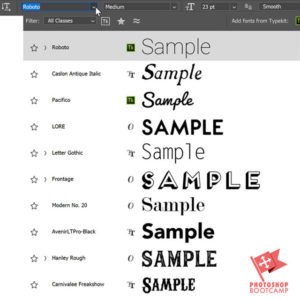
On the options bar at the top of the screen, choose a typeface, a type style, a font size and a font colour. In this example, I chose Century Gothic, Bold, size 30pt, and white for the colour.

4. Click anywhere on your image where you want to put your type.
Photoshop automatically adds some dummy text “Lorem Ipsum”.

Now you can type or paste in your own text directly on top of the dummy text.
Type sits on a line known as the “baseline”. You’ll see this line while you’re adding text, but it will disappear once you commit your type.
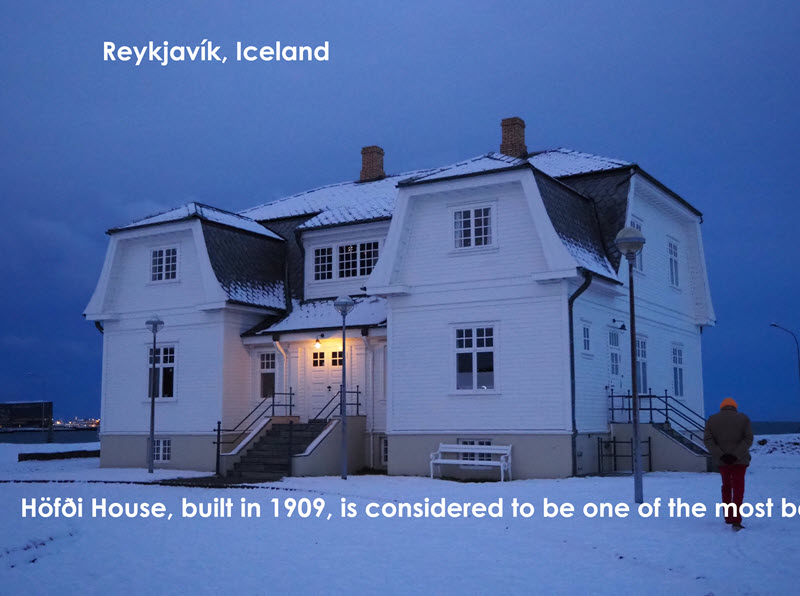
I’m adding the words Reykjavík, Iceland to my image.

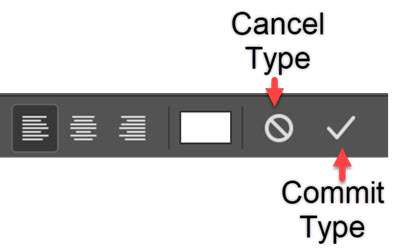
5. When you’ve finished adding text, you need to do any one of the following:
- Click the Commit button in the options bar.
- Press Ctrl+Enter (Windows) or Command+Return (Mac OS).
- Click on any other tool in the toolbar
6. Let’s add another piece of text to the bottom part of the image.
Repeat the steps above to add more text to the image.
This time I’m pasting in a longer piece of text that I have copied.
Photoshop retains the same type settings that we used when we added the first piece of text. We’ll edit this new piece of text shortly.
Notice that there are now two Type layers in the Layer panel.

How to Edit Type In Photoshop
Let’s make some changes to the formatting of the type.
1. Select the Horizontal Type tool again.
Select the type layer you want to edit in the Layers panel or click directly on the text on your image to select that type layer.
In this case, I want to increase the size of the words “Reykjavik Iceland”.
2. You can select one or more characters by clicking and dragging to highlight the text.
Extra Type Tool Tip: You can double click anywhere in a word to select that whole word, or you can triple-click in a word to select the whole sentence.

Once the text is selected, you can make the changes using either the Options bar at the top of the screen or by making changes on the Character panel.
To open the Character panel, choose Window > Character. I am increasing the text size to 72pt.
4. Click the Commit button in the options bar to finalize the text.
Now let’s tackle the longer piece of text. As you can see from the image above, this sentence is running off the side of the image.
5. To send text onto a new line, select the Type tool again and then click at the end of the word where you want a line to end, then press Enter to send the remaining text onto a new line.
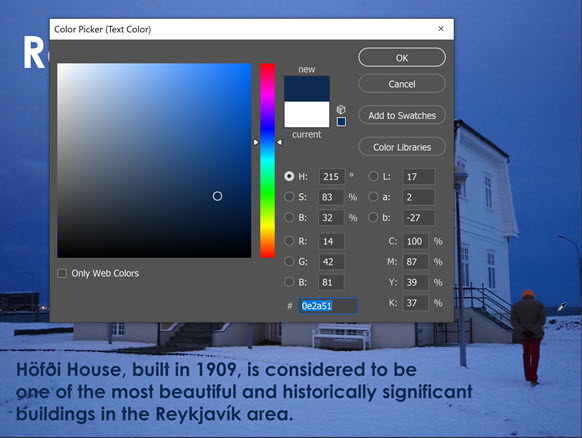
How To Change The Colour Of Text In Photoshop
6. To change the text colour, highlight all of the text using the Type tool.
Double click on the colour swatch on the tool options bar at the top of the screen.
The Colour Picker opens.
Choose the colour you want for your text, in this case, I’m picking a dark navy, then click OK.
7. The final edit I want to make to this text is to decrease the size of the type.
Making sure the text is selected, change the Type Size on the tool options bar. I changed mine to 18 pt. Then commit the change.
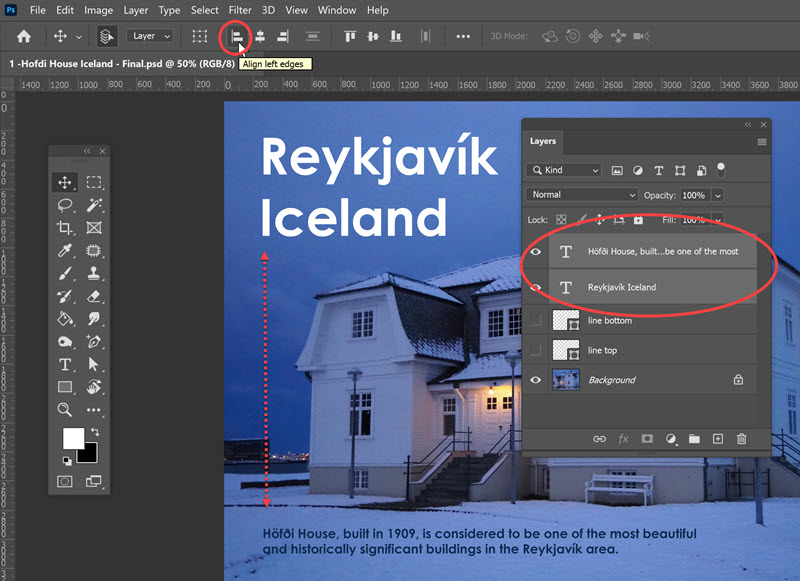
How To Align Text In Photoshop
One way to quickly improve your designs is to use the principle of alignment. Which simply means aligning edges of objects, in this example, aligning our text on the left side.
1. In the layers panel, select the two text layers by clicking once to select one layer, then holding down Shift and clicking the next layer.
2. Select the Move tool in the toolbar.
3. In the tool options at the top of the screen, click on the Align left edges icon.
The two separate pieces of text will align along their left edges.
How To Move Text In Photoshop
You can also move text around by selecting the Move tool (V) from the toolbar. Then simply click and drag the text to place it where you want. I want to line my text up on the left-hand side.
Final Design Touches - Adding Two Lines
The final touch is to add two lines above and below the longer piece of text.
This is a simple element that adds to the overall design of the piece.
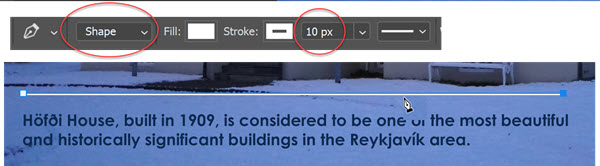
1 Select the Pen tool in the Toolbar.
2. On the Tool Options at the top, make sure the Pen tool is set to Shape, set the line colour to white and the width to 10px.
3. Click once to add your first anchor point with the Pen tool. Then move to the right side of your text and click once more.
A path, or line is drawn between the two points and filled in white.
Click on any other tool in the toolbar to complete the path. Now you have a new shape layer in your Layers panel.
4. Duplicate this layer by pressing Ctrl + J (PC) or Cmd + J (Mac). Then drag the second line underneath your text.
And here is the final image. Ta da!
I hope you found this Photoshop Type tutorial useful.
You’ve learned how to add type, how to edit it to change typeface, colour and size, how to align objects and how to move type around your image.
If you want to learn about how to create Paragraph Type, I’ve written another tutorial about how to work with paragraph type in Photoshop here.
If you want to learn about how to create Type along a path, read my tutorial on how to add type along a path in Photoshop.
Please share it! Thank you. 🙂
Pin this for later.
Get A Free Printable Photoshop Toolbar Cheatsheet
Subscribe now to get a free printable poster showing all of the Photoshop tools and their keyboard shortcut.