Physical Address
304 North Cardinal St.
Dorchester Center, MA 02124
Physical Address
304 North Cardinal St.
Dorchester Center, MA 02124
Last Updated on February 15, 2023
If you want to learn Photoshop, the best place to start is to get to know the Photoshop workspace or interface.
Photoshop is jam-packed with tools, panels, menus and options. It is no wonder then, that many people feel overwhelmed when they are getting started. This quick guide shows you where everything is with links to more in-depth tutorials on tools and panels.
This is Day 1 of the 30 Days of Photoshop For Beginners. If you need it, you can download a free Photoshop trial here.
The screengrabs in this tutorial are from Photoshop CC 2020. However, the interface and workspace haven’t changed much between versions. So even if you have an older or newer version of Photoshop, this is all still relevant.
To get started open ANY image in Photoshop by choosing File > Open and pick any image you want from your computer or hard drive.
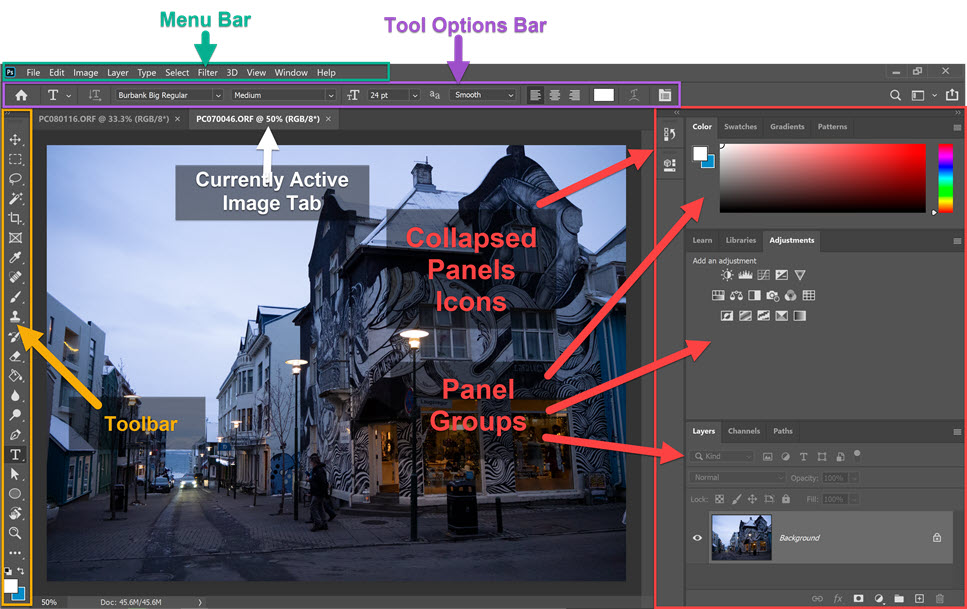
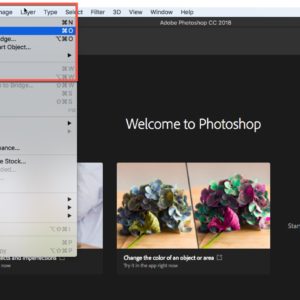
When you open Photoshop, it should look a little bit like the screengrab above. Yours might look slightly different, but it should be fairly similar.
Your opened image sits in the document window and you can open multiple images in Photoshop at one time. In the example above, I have two images open and I move between them by clicking on the name tab.
The menu bar always sits at the top of the screen. There are 11 menus with many options underneath each.
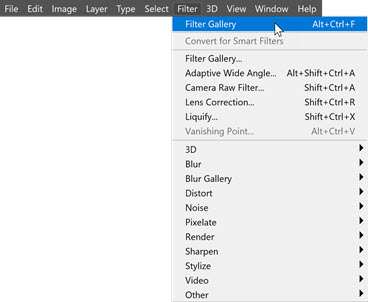
Click on each menu item to see what’s available. You’ll notice some options are greyed out which means they are not currently available.
In the example here, you can see the contents of the Filter menu. This has several sub-menu items – 3D, Blur, Distort and Sharpen to name a few. Each one of those items has its own sub-menu.
As you can see there are many commands available under the menu bar.
The toolbar sits on the left-hand side of the workspace and it holds the tools we use to create, edit, manipulate our images.
We can move it freely around and can view it as a long, skinny, single-column toolbar, or as a wider, shorter, double-column toolbar.
Click here to read more about how to use Photoshop tools.


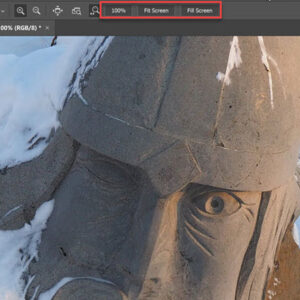
As the name suggests, this bar gives us options or settings that we can apply to whichever tool we are currently using.
The options are context-sensitive, so for example, if you are using the Type tool the options which appear in this bar will be exclusive to Type. If you are using the Paintbrush tool, you will see options only for controlling the Paintbrush.
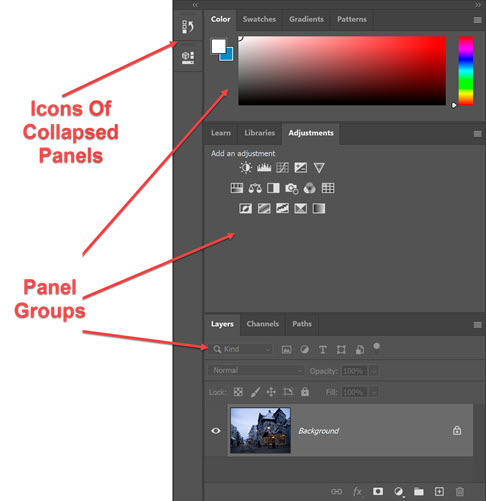
Panels sit on the right-hand side of the screen, and like the toolbar, they can be dragged out and moved freely around the workspace. They provide lots of extra functionality.
Click here to read more about how to use Photoshop Panels and how to customise your workspace.
That’s a brief overview of the Photoshop workspace. We’ll be learning more about individual panels and tools as we move through the 30 Day Photoshop For Beginners series.
(If you want to know more about buying a subscription for Photoshop, check out this post where I explain the different plans and how to get the best deal on Photoshop.)


Dear Jennifer,
I trust this message finds you well. My name is Frank Kwaku Doyi, and I am writing from Accra, Ghana. This is just a quick one to say that I have gone through your tutorial and find it extremely helpful. As a beginner, I have learned a lot and would like to continue learning from you.
Thank you very much for sharing this useful lesson with us.
I look forward to learning more from you.
Best regards,
Frank