Physical Address
304 North Cardinal St.
Dorchester Center, MA 02124
Physical Address
304 North Cardinal St.
Dorchester Center, MA 02124

Last Updated on September 10, 2020
A selection lets us isolate part of an image. Once a selection is made, only that part of the image will be affected when we edit it. Photoshop provides several tools and functions to make it easy to make selections. In the following guide, you’ll learn how to make selections in Photoshop using Marquee tools, Freehand lasso tools, colour based selection tools and the new Object Selection tools.
Learning how to create selections in Photoshop is an essential skill. You will make selections over and over again when using Photoshop to edit and create new images.
Download a free Photoshop trial.
Once you make a selection, only the area within that selection can be edited or modified. Areas outside the selection are protected from change. In this guide, I’m going to show you how to use each of the main Selection Tools in Photoshop. By the end of this article, you will know which selection tool to use for the job and will be able to modify your images in many ways.
Photoshop provides lots of different tools for making selections. First though, let’s have a look at why you might want to make a selection.
Often when you’re working on an image, you’ll only want to change a small part of it. By making a selection you are isolating just that part of the image which means you can do lots of cool things to only that part, such as:
Photoshop provides three main sets of selection tools in the toolbar: the Marquee tools, the Lasso tools, and the Quick Selection tools.
The best selection tool for the job will often depend on the characteristics of that area, such as shape or colour.
We use the Rectangular Marquee tool () to select a rectangular area in an image.
The Elliptical Marquee tool (), which is hidden behind the Rectangular Marquee tool, selects circular or oval-shaped areas.
The Single Row Marquee tool () and Single Column Marquee tool () to select either a 1-pixel-high row or a 1-pixel-wide column, respectively.
You can drag the Lasso tool (![]() ) around an area to trace a freehand selection, it’s almost like using a pencil and is useful for making loose selections around objects or elements that don’t fit easily into a rectangle or circular selection.
) around an area to trace a freehand selection, it’s almost like using a pencil and is useful for making loose selections around objects or elements that don’t fit easily into a rectangle or circular selection.
The Polygonal Lasso tool (), draws straight lines between clicks of the mouse.
The Magnetic Lasso tool () works something like a combination of the other two lasso tools, and it works most effectively when there is good contrast between the area you want to select and its background.
The Magic Wand tool () selects parts of an image based on the similarity in colour of adjacent pixels. It is useful for selecting odd-shaped areas that share a specific range of colours.
The Quick Selection tool () quickly “paints” a selection by automatically finding and following defined edges in the image.
Some other tools that should be mentioned here are the Crop tool, the Pen tool and the Quick Mask mode.
The Pen tool lets us draw paths around objects which can then be converted to selections. The Pen tool is unique and definitely has its own steep(ish) learning curve so I’m not going to discuss it in this article, but I will in a separate post.
The Crop tool could be considered a selection tool because you use it to select part of an image and then transform it by either cropping away (deleting) the parts of the image that were outside the selection, or in some cases adding area to the canvas if the selection is bigger than your starting image. Again, the Crop tool warrants a post of its own too.
The Quick Mask mode lets make new selections or fine-tune existing by painting with a brush tip of your choice.
Getting back to the main Selection Tools now, let’s look at each tool, in turn, to see how exactly they work.
These tools are what you might consider the “old school” Photoshop selection tools and in some ways, they are the easiest to use.
1. Open an image in Photoshop. I’m using this photograph of a ballerina, but you can follow along with any picture.
2. Select the Rectangular Marquee tool by clicking on the tool in the Toolbar or pressing M on the keyboard. Click and hold down the mouse button, then start to drag diagonally around an object. In this case I’m dragging a square shape around the ballerina’s face.
3. When you’re happy with your selection, release the mouse button. Your selection is made and you’ll see a rectangle or square dashed line around the object. This moving dashed line is often known as the “Dancing Ants”. The area inside the Dancing Ants is your selection. Any changes you make now will only affect the area inside the selection. In the next step, you’ll change the colour balance and see how only the selected part of the image changes.
4. Choose Image > Adjustments > Color Balance. Drag the Red slider all the way to the right-hand side. Notice how everything inside the selection is changing to a red colour while everything outside the selection is protected and does not change.
5. Click Cancel on the Color Balance dialog box to get back to your image without making any changes.
No matter which selection tool you use, you can get rid of a selection (deselect) by doing any of the following:
To crop the image around your selection, choose Image > Crop. This will delete everything outside of your selection and resize the image canvas to the size of your selection.
The Elliptical Marquee tool works in the same way as the Rectangular Marquee, except that it draws circles and ovals.
1. Select the Elliptical Marquee tool by clicking on the tool in the Toolbar. The keyboard shortcut is to hold down the Shift key and press M on the keyboard. Holding down Shift will cycle through a set of keyboard shortcuts when more than one tool has the same keyboard shortcut.
2. With the Elliptical Marquee tool selected, click and hold down the mouse button, then start to drag diagonally around an object. This time you’ll see a circular shape.
Realistically these selection tools are not used as often as the other marquee tools but they certainly do have their uses. If for example, you wanted to trim off just a tiny piece of an image, you could use one of these tools to select a single row or column of pixels the full width or height of the image.
Another nice use of this tool in graphic design is to simply fill the selection with a colour. This creates a hairline border.Here’s how to do it.
1. Select the Single Row Marquee tool. (There is no keyboard shortcut for this tool)
2. Click once on the image. A row of dancing ants will appear.
3. Right-click on the selection and choose Fill from the pop-up menu.In the drop-down box, you can choose from a Foreground or Background colour or choose “Color” to get the Color Picker.
4. The selection is filled with colour. You may not see the colour because it is such a tiny selection, so press Cmd + D / Ctrl + D to deselect the selection and the colour will now be obvious. Below you can see a zoomed in view of the fill I’ve applied.
Obviously, not everything you want to select will be a circle or square so we can turn to the three Lasso and Pen tools (which is not discussed here) to make more complex selections.
The Lasso Tool is a freehand tool and is great for making fast, loose selections, or if you have a very steady hand (which I definitely don’t), you can make more intricate selections. You can drag the Lasso tool around an area to trace a freehand selection, just like drawing with a pencil. I actually use the Lasso tool a lot when I’m making my illustration work.
1. Select the Lasso tool in the toolbox or press L on the keyboard.
2. Click and drag the mouse around the object you want to select as if you were drawing a line with a pencil.
3. Keep drawing with the lasso until you reach the starting point (or near the starting point), then let go of the mouse. Your selection will kick in.
The Polygonal Lasso tool draws only straight line segments around the area you’re selecting. It’s extremely easy to use.
1. Click on the Polygonal Lasso tool in the toolbar or hit Shift L to cycle through each of the Lasso tools until you come to the Polygonal Lasso.
2. For this example, I’m making a selection around the head of the statue below. Start the selection by clicking once in the image.
3. Move your mouse farther along the edge that you’re selecting then click again and a selection line appears between the two clicks. Every time you click, another straight line connects that point to the previous point.
4. To close the path and make the selection, click on the original point. Or double-click—wherever you double-click, that line will snap to the beginning.
The Magnetic Lasso tool is somewhat like a combination of the other two lasso tools, and works best when there is good contrast between the area you want to select and its surroundings.
When you draw with the Magnetic Lasso tool, the border automatically snaps to the borders between areas of contrast. You can also control the selection path by occasionally clicking the mouse to place anchor points in the selection border.
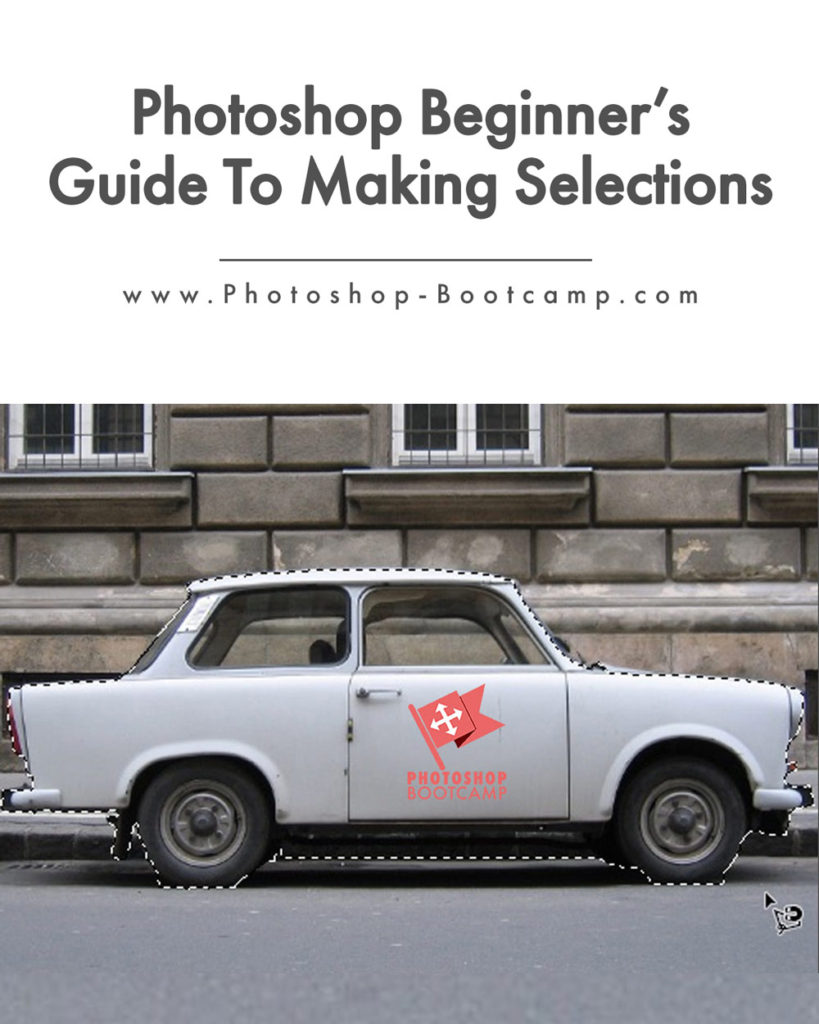
1.Open an image in Photoshop. I’m using this picture of a Trabant car I took on a street in Budapest. I’m going to use the Magnetic Lasso Tool to draw a selection around the car. As you can see , there is a reasonably good contrast between the car and the background except under the wheels and the middle of the car where there is a dark shadow between the car and the kerb and the ground.
2.It’s a good idea to zoom in so that the main object of interest fills the screen. It makes it easier to use Selection tools when you can clearly see what you’re attempting to select. Use the Zoom tool (Z) and bring the picture to a magnification where you can see the whole object.
3. Select the Magnetic Lasso tool, which may be hidden under the Lasso tool.
4.Click once to start your selection, then trace the outline of the object you’re selecting by moving the magnetic lasso pointer around the edge, staying fairly close to the edge as you move. Do not hold down the mouse button.
The cool part about this tool is that, although you may not be tracing 100% accurately with your hand, the magnetic tool snaps to the edge of the object and automatically adds fastening points. It does this very well if there is good contrast between the object and it’s background.
If you think that the tool is not following the edge closely enough, you can add your own fastening points by clicking the mouse button. You can add as many extra fastening points as you feel are necessary. You can also remove the most recent fastening points by pressing Delete for each anchor point you want to remove. Then, move the mouse back to the last remaining fastening point and continue selecting.
4. When you have traced the whole way around the object you’re tracing and reach the starting point again, move the Magnetic Lasso over the starting point and click once. Or double-click the mouse button to make the Magnetic Lasso tool close the selection.
5. The selection around the object is now complete. At this point you can make any edits that you like and they will be applied only to the selected area of the image.
1. With the dancing ants still visible, make a duplicate of this selection by pressing Cmd + J (Mac) or Ctrl + J (Windows) to duplicate the selection and put it on a new layer.
2. To see your selection with a transparent background, in the Layers panel, click on the eye icon on the Background layer to turn off it’s visibility. You can now see your selected object sitting on its own layer with transparency all around it.
Notice that once you duplicate the selection onto its own layer, the dancing ants disappear, meaning your selection is gone too. Selections are temporary and they will disappear if you deselect them either on purpose or by accident! Usually you can hit Cmd + Z (Mac) Ctrl + Z (PC) to step back if you’ve accidentally lost your selection.
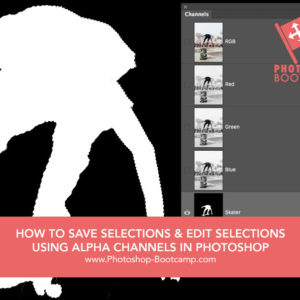
Selections can actually be saved permanently as Alpha Channels which are saved with your Photoshop PSD file, but that’s another day’s work 🙂
We’ve seen the tools that allow us to select areas by shape and the tools to make irregular shaped, freehand selections. Our final set of tools are those that let us select an area based on colour. When used in the right places these tools, namely the Quick Selection and Magic Wand tools are fast and easy.
As the name suggests, this tool allows you to make a selection quickly by painting in the area you want to select with a round brush tip. The brush tip size is adjustable, allowing you to paint both large and small areas. A larger brush creates a larger selection. You change the size of the brush tip either in the Options Bar or better yet with the same keyboard shortcuts for changing the size of any brush - left bracket key to increase the size.
For the best results with this tool, use a hard-edged brush to produce well-defined edges
As you drag the tool around, the selection expands out and automatically finds and follows any strong, defined edges in the image. Like the Magic Wand tool (which is coming up next) it selects pixels based on tone and colour. However, where the Quick Selection Tool outshines the Magic Wand is by also looking for similar textures in the image.
1. Open an image you want to make a selection in. I’m using this photo of two musicians dressed in Medieval clothing outside a modern department store 🙂 I want to select the female musician on the right. The Quick Selection tool will work well in this situation because the colour of her clothes are quite different to the background.
2. Zoom in close on the area you’re selecting, then choose the Quick Selection tool (W)In the Options bar at the top of the screen you can choose to set the Brush tip size and the hardness. You’ll get better results with this tool by using a hard-edged brush instead of a soft-edged one. A hard brush is 100%. All of the other options can stay as they are.
3. Paint over the area you want to select. As you paint the selection expands to encompass pixels similar in colour to the ones you’re brushing across. In the case of the image I’m using, the selection rapidly fills out over the purple and yellow of the clothes and stops at the edge.
4. Keep painting until you’ve filled the area you want to select.Now it is almost inevitable that you will select parts of the image that you don’t want. That’s where you can Subtract from the selection. In the image below, the arrows show areas inside the selection that I don’t want to include, mostly background that has been picked up between her arms and her hair.
5. To deselect just those areas, hold down the Option key (Mac) or Alt (Windows). You’ll see the brush tip change from having a + symbol inside it to a - symbol. These areas are quite small so it’s a good idea to decrease the brush size by hitting the left bracket [ key. Paint in those areas you want to remove. If you overdo the subtraction, then release the Option or Alt key and paint back in the selection.
The Magic Wand lets you select areas of colour by clicking instead of dragging like the Quick Selection tool. The Magic Wand is brilliant for picking large blocks of similar colour, such as sky or a simple background, while the Quick Selection tool is better for selecting more complex objects.
1. Select the Magic Wand tool by either clicking on it in the toolbar, or by pressing Shift + W to cycle from the Quick Selection to the Magic Wand.
2. In the Options bar
• Set the “Tolerance” level to a low number to limit the colour selection close to the first colour that you click on. Set a higher number to pick up more colours outside that starting colour.
• Check “Anti-alias” for a smooth edge.
• To select all similar colours in the image with just one click, uncheck “Contiguous”. If “Contiguous” is checked, only similar colours that are touching are selected.
3. Just single-click on your image to select an area. Depending on the complexity of the image, you should find that most, if not all of the pixels in the colour you clicked on will be selected. You might see some small “islands” left which are areas that were not selected.
4. To add to the selection and get rid of those islands, hold down Shift and click in another area to select more.To subtract from the selection, if it’s picked up some pixels that you don’t want to be selected, hold down Option / Alt and click.
Well, my friends, that completes the beginner’s guide to using Photoshop’s Selection tools. In another post, I’ll show you how you can refine your selections.
Another tool, that I haven’t mentioned as a selection tool is the Pen tool. If you’d like to learn more about how to draw with the Pen tool, check out my beginner’s guide to the Pen tool here.
I hope you’ve found it useful. If you have questions, please put them in the comments area below and I’ll do my best to answer them.
Download a free Photoshop trial.
One of the best ways to improve your skills and speed up your workflow in Photoshop is to use keyboard shortcuts. This giant, printable cheat sheet shows all of the shortcuts for every tool in the toolbox.
Join over 1500 Photoshop beginners and improvers who have signed up to the Photoshop Bootcamp newsletter. Get Photoshop tips and tutorials delivered right to your inbox.
![]()