Physical Address
304 North Cardinal St.
Dorchester Center, MA 02124
Physical Address
304 North Cardinal St.
Dorchester Center, MA 02124
*Updated August 2021*
Usually, when you change the opacity of a layer in Photoshop using the Opacity slider at the top of the Layers panel, the WHOLE layer changes to that opacity. There may be times though when you want only a small part of one layer to be transparent or semi-transparent.
The trick, my friends, is that you need to firstly select the part of the layer that you want to adjust the transparency of and then make your adjustment. AND for this trick, you don’t use the opacity slider on the layers panel, but rather a Fill command from the Edit menu. Read on to see how quick and easy it is.
You can download a free trial of Photoshop here.
Here is a handy way to change the opacity of just a selected part of any layer. If you’re new to Photoshop and making selections, check out my Beginners Guide to Photoshop Selections.
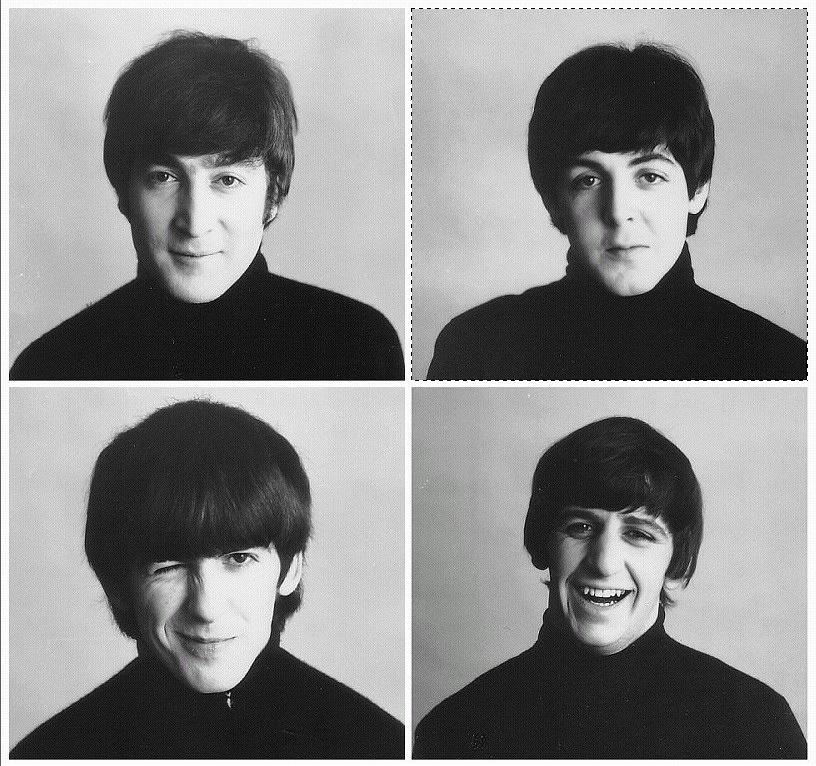
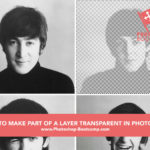
1. Open your image in Photoshop. I’m using this nice quadrant-style picture of The Beatles, make a selection around the area you want to change the Opacity on. I’ve used the rectangular marquee tool to draw a square around Paul McCartney.
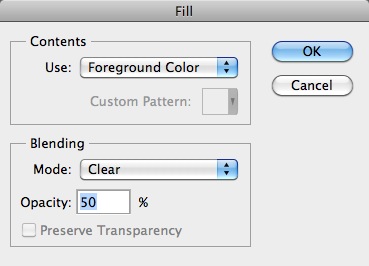
2. Choose Edit > Fill and set the Blending Mode to Clear. Set the Opacity to the percentage you want - I chose 50% here.
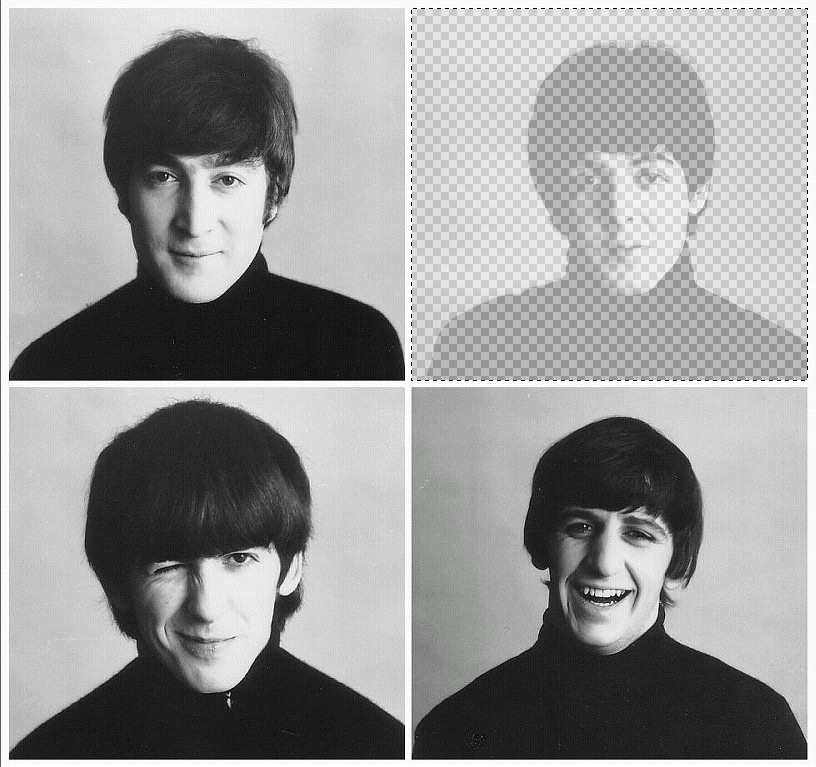
3. Click OK. The selected part of your layer is now semi-transparent while the remainder of your file stays at 100%.
By the way, I have nothing against Paul McCartney 🙂
I hope you’ve found this Photoshop quick tip useful and I would be really grateful if you would share it. Thank you so much! 🙂
Subscribe now to get a free printable poster showing all of the Photoshop tools and their keyboard shortcut.


Really helpful, cheers 🙂
Glad it helped, thanks Ritchie.
This didn’t work for me because the clear option within fill was disabled.
Doesn’t work. The “fill” item is greyed out.
“Fill” item is greyed out as others are repoting. This has something to do with the fact that the image layer is a “smart object” and that prevents the ability to do this type of editing. Any edit generates the this is a smart object and you can’t edit it type error message. Not sure how to change the layer type so that the “fill” becomes selectable again. I’m sure their is a way and in common photoshop style can probably easily be accomplished in 400-500 easy steps.
Thanks, Jennifer for sharing this. It’s a short write-up but a cool tutorial. Looking forward to learning more from you.