How Do I Get My Pictures Into Adobe Lightroom?
If you’re just getting started with Adobe Lightroom Classic, you may be wondering how to import your photos and start editing?
Whether it’s with a phone, a point and shoot camera, or a DSLR camera, we are taking tons of pictures, memories and compelling photographs. The problem is, we’re creating a huge amount of media and it becomes unwieldy very quickly. Simply managing our photographs and finding them becomes an extra job.
This is where Lightroom comes in. As well as being a tool to edit and improve our pictures, Lightroom helps us organise our pictures and videos in a manageable way.
Click here to download a free trial of Adobe Photography Plan (Lightroom and Photoshop)
This is tutorial is especially for you if you are a Lightroom beginner. I’ll show you how to get set up the right way from the very start so that you can always find your photos and easily import them in Lightroom.
Setting Up Your Photography Folders
Before we even open Lightroom, I have a recommendation for you.
If you don’t already do this, then I highly recommend that you Keep all of your images together on an external hard drive.
As you take more and more photos, you will find that hard drive space on your laptop or desktop will fill up very quickly. It’s a good idea to have a backup of these photos somewhere else too, just in case that hard drive goes belly up.
For your own sanity, create a folder on your external hard drive and call it Photos, or My Photo’s or Jen’s Photos (if your name is Jen). From this point on, store all of your pictures in there. We can use subfolders inside our main Photos folder.
The important thing is you know that ALL of your pictures are stored in there and it will make life soooooooooooooo much easier for you.
If you don’t have an external hard drive at the moment, then still keep all your pictures together in one umbrella folder called Photos (or similar) until you get an external drive in the future.
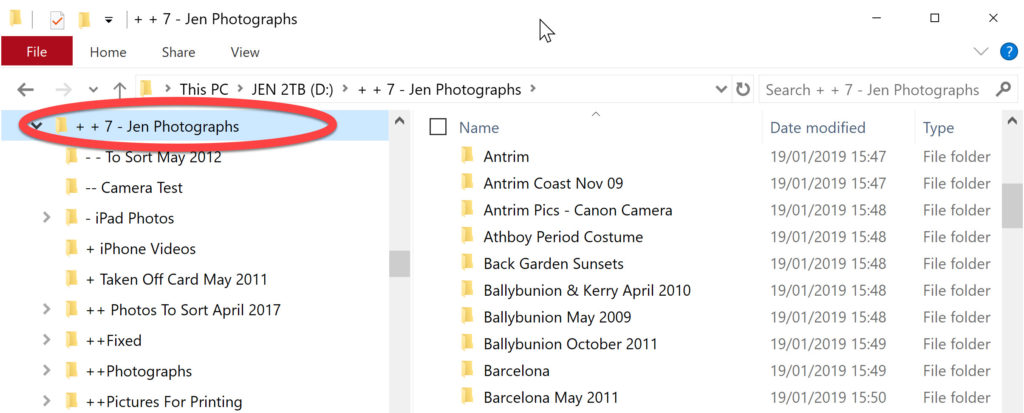
Now that we know EXACTLY where our photos are, let’s open up Lightroom Classic.
How To Import Photos From A Folder
When you open Lightroom Classic for the very first time, it looks like this:
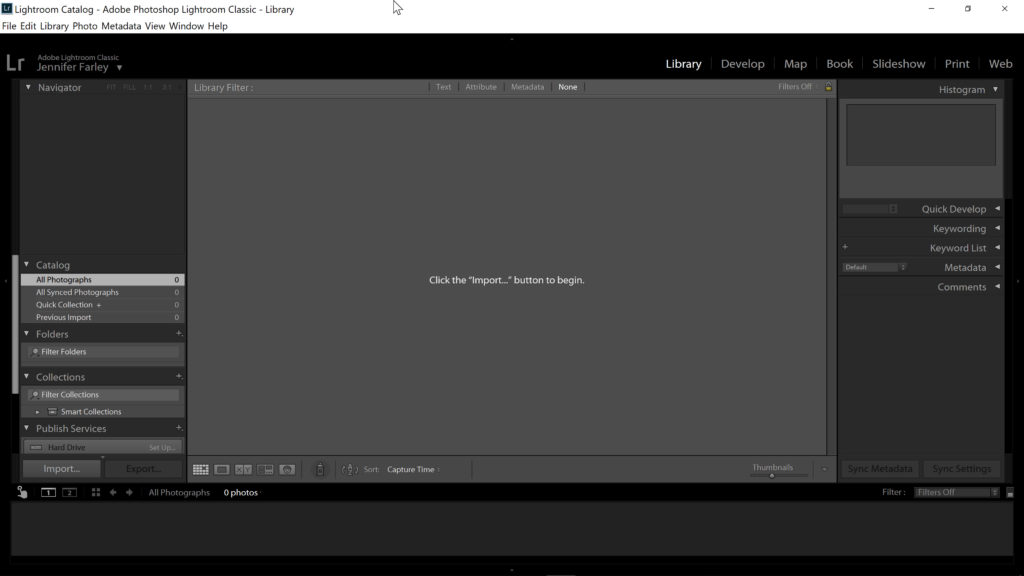
1. Let’s make sure we’re in the Library module in Lightroom. If your interface doesn’t look like the above, click on the word Library on the menu in the top right of the screen.
2. In the Library module, click on the Import button in the lower left-hand part of the screen. Another way to get the same import command is to choose File > Import Photos And Video … under the File pull-down menu.
Note: The keyboard shortcuts to Import Photos in Lightroom are Shift + Ctrl + I (windows) or Shift + Cmd + I (mac)
3. The Import dialog asks us to select our source, which just means, pick the folder where your photos are. As we have cleverly created one overall “Photos” folder where we keep all our files, simply navigate to where that folder is on your external hard drive (or internal hard drive). Then click on the folder or subfolder which holds the images you want to import.
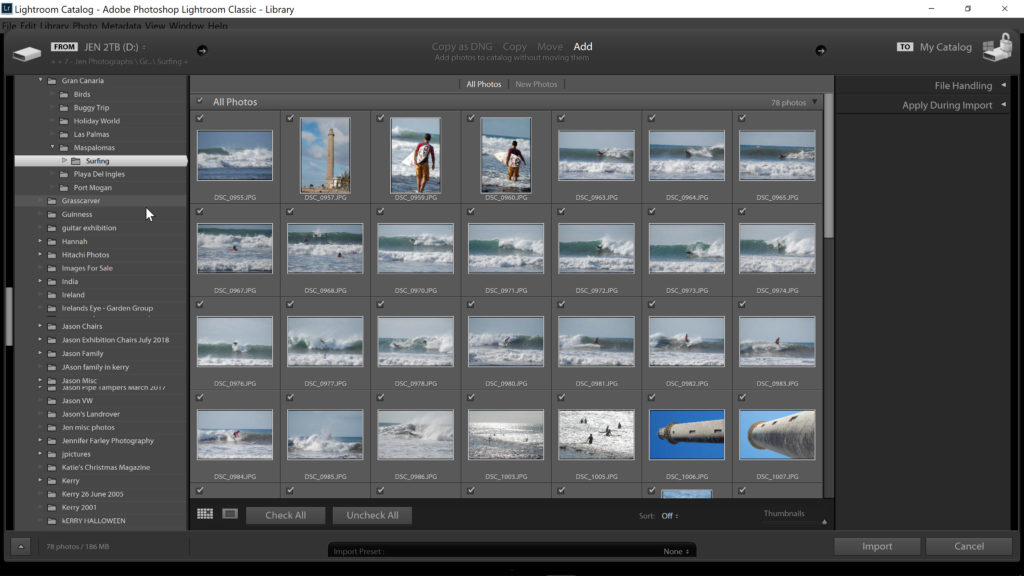
In my example, my folder structure to the pictures I want to import is Jen Photographs/Gran Canaria/Maspalomas/Surfing.
4. When you click on the folder, you should see your images appear in the middle column.
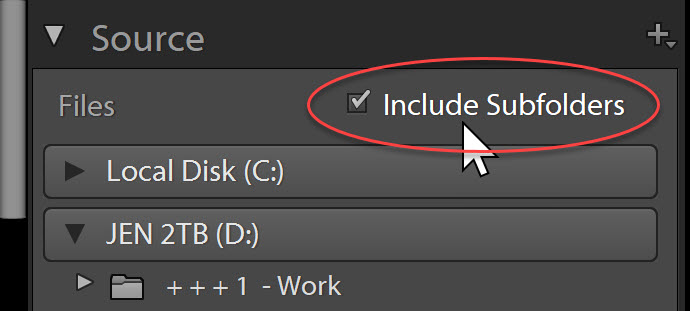
If you don’t see your images, make sure that you have the “Include Subfolders” checkbox checked. If it is not checked it will only show the top level folder and nothing inside of it.
5. Now we can see all of our lovely photographs. If you want to bring in ALL of the photos in the folder, simply click on the Import button on the bottom right of the screen. And that’s it. Your photos are imported. Easy peasy, lemon squeezy.
How To Import Individual Photos Into Lightroom
If you DON’T want to import all of the photos in the previous step, then we can easily make a choice about which ones we want to import.
1. Click on Uncheck All. You’ll see that all of the images are now greyed out. If we only want to bring in specific individual images, then click on these checkboxes and select the ones you want to be imported into Lightroom. Then click Import at the bottom right of the screen.
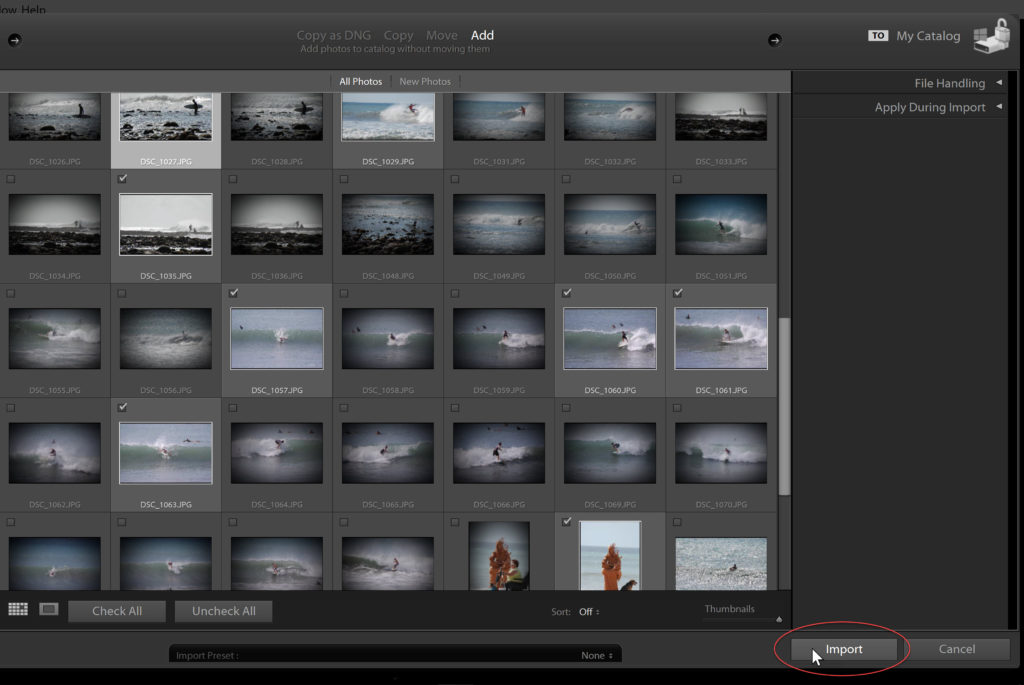
Only those specified images are imported into Lightroom.
Now there are other options available to use when we import our photos, but I wanted to show you, as a Lightroom beginner, the basics to quickly and easily get your photos into Lightroom.
Click here to download a free trial of Adobe Photography Plan (Lightroom and Photoshop)
You can read more of my Beginner’s Adobe Lightroom Tutorials here.
I hope you found this useful. Please share it! Thank you 🙂

