Physical Address
304 North Cardinal St.
Dorchester Center, MA 02124
Physical Address
304 North Cardinal St.
Dorchester Center, MA 02124

Last Updated on July 4, 2018
The Sponge Tool is one of Photoshop’s image retouching tools. It lets you increase the intensity of a colour (saturation) or decrease the amount of colour (desaturation) until it starts to lose all colour and becomes grey scale. The tool works as a brush, which means we can change the tip shape and size. As well as dramatically adding or reducing colour, it’s also a handy little tool for making small subtle saturation changes to specific areas of an image.
The important thing to note is that when you are working with the Sponge tool, you are changing the pixels in your image. This is known as destructive image editing. It’s not a huge deal, all we need to do is make a duplicate layer and work on that, but I just wanted to mention it.
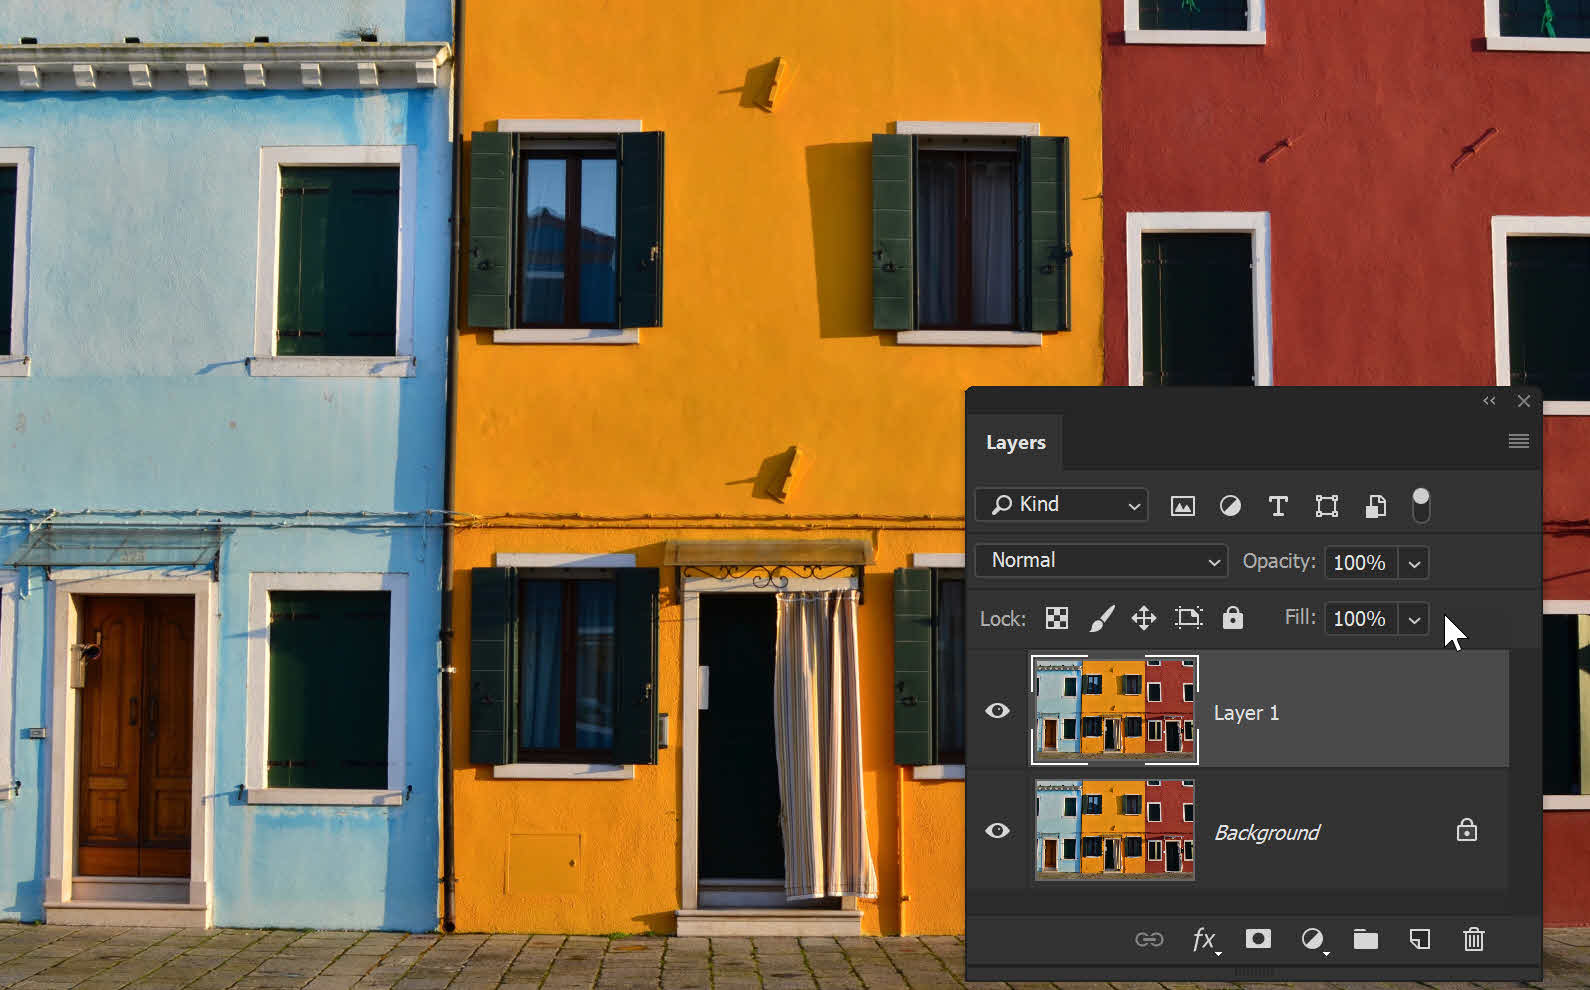
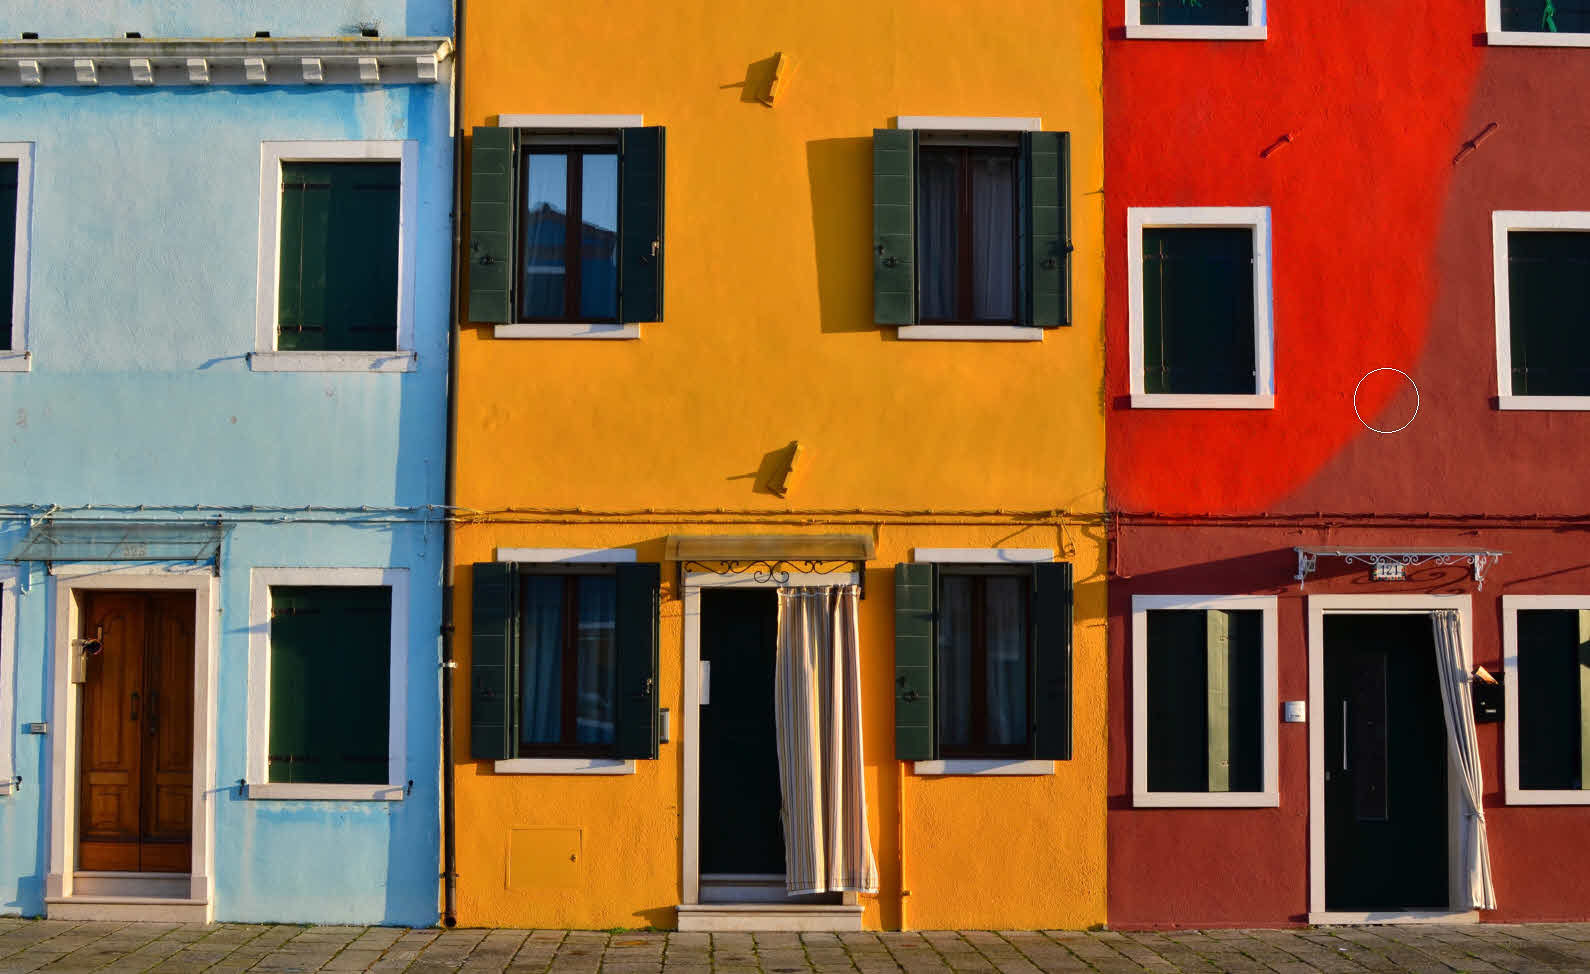
Let’s take a look at how to add or increase the intensity of the color first. I’m using a photo of a colorful row of houses. If you want to follow along you can down this Photo by matthaeus on Unsplash for free. Or you can open one of your own photos.
1. Open the image in Photoshop.
2. We’ll make a duplicate of the image on a new layer because we are doing some destructive editing and we don’t want to permanently change our original image.
Press Cmd + J (Mac) or Ctrl + J (Windows) to make a duplicate layer.
3.Select the Sponge tool (O) .
Note that it will probably be hidden under the Dodge tool.
4. On the tool options bar at the top of the screen, do the following:
![]()
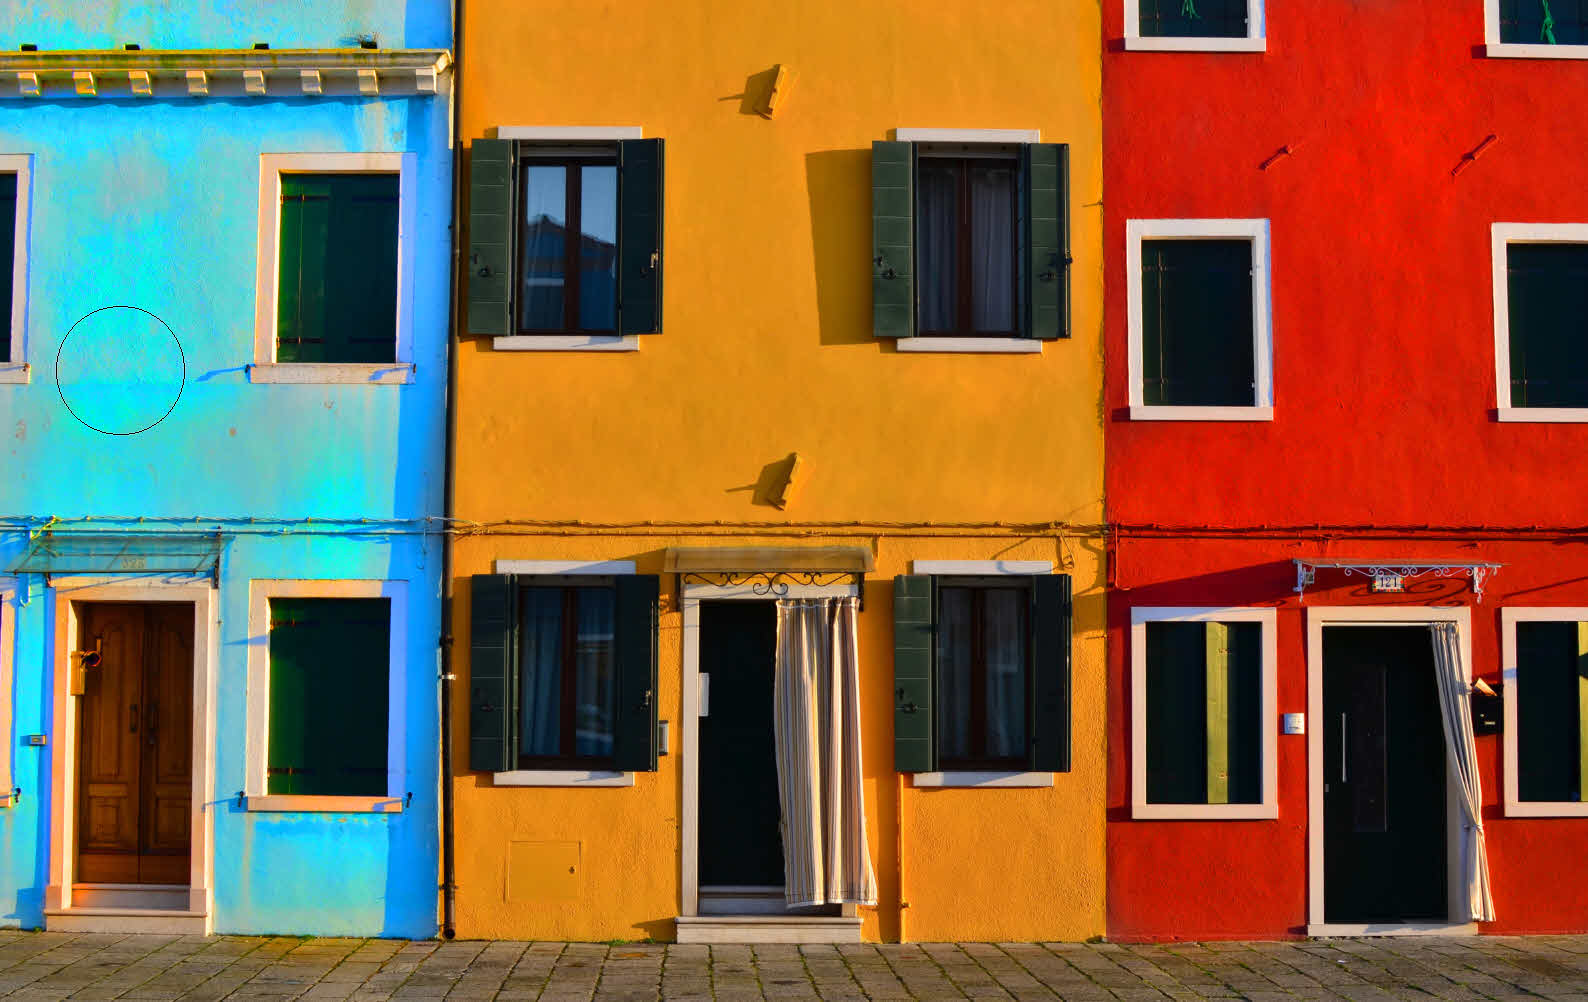
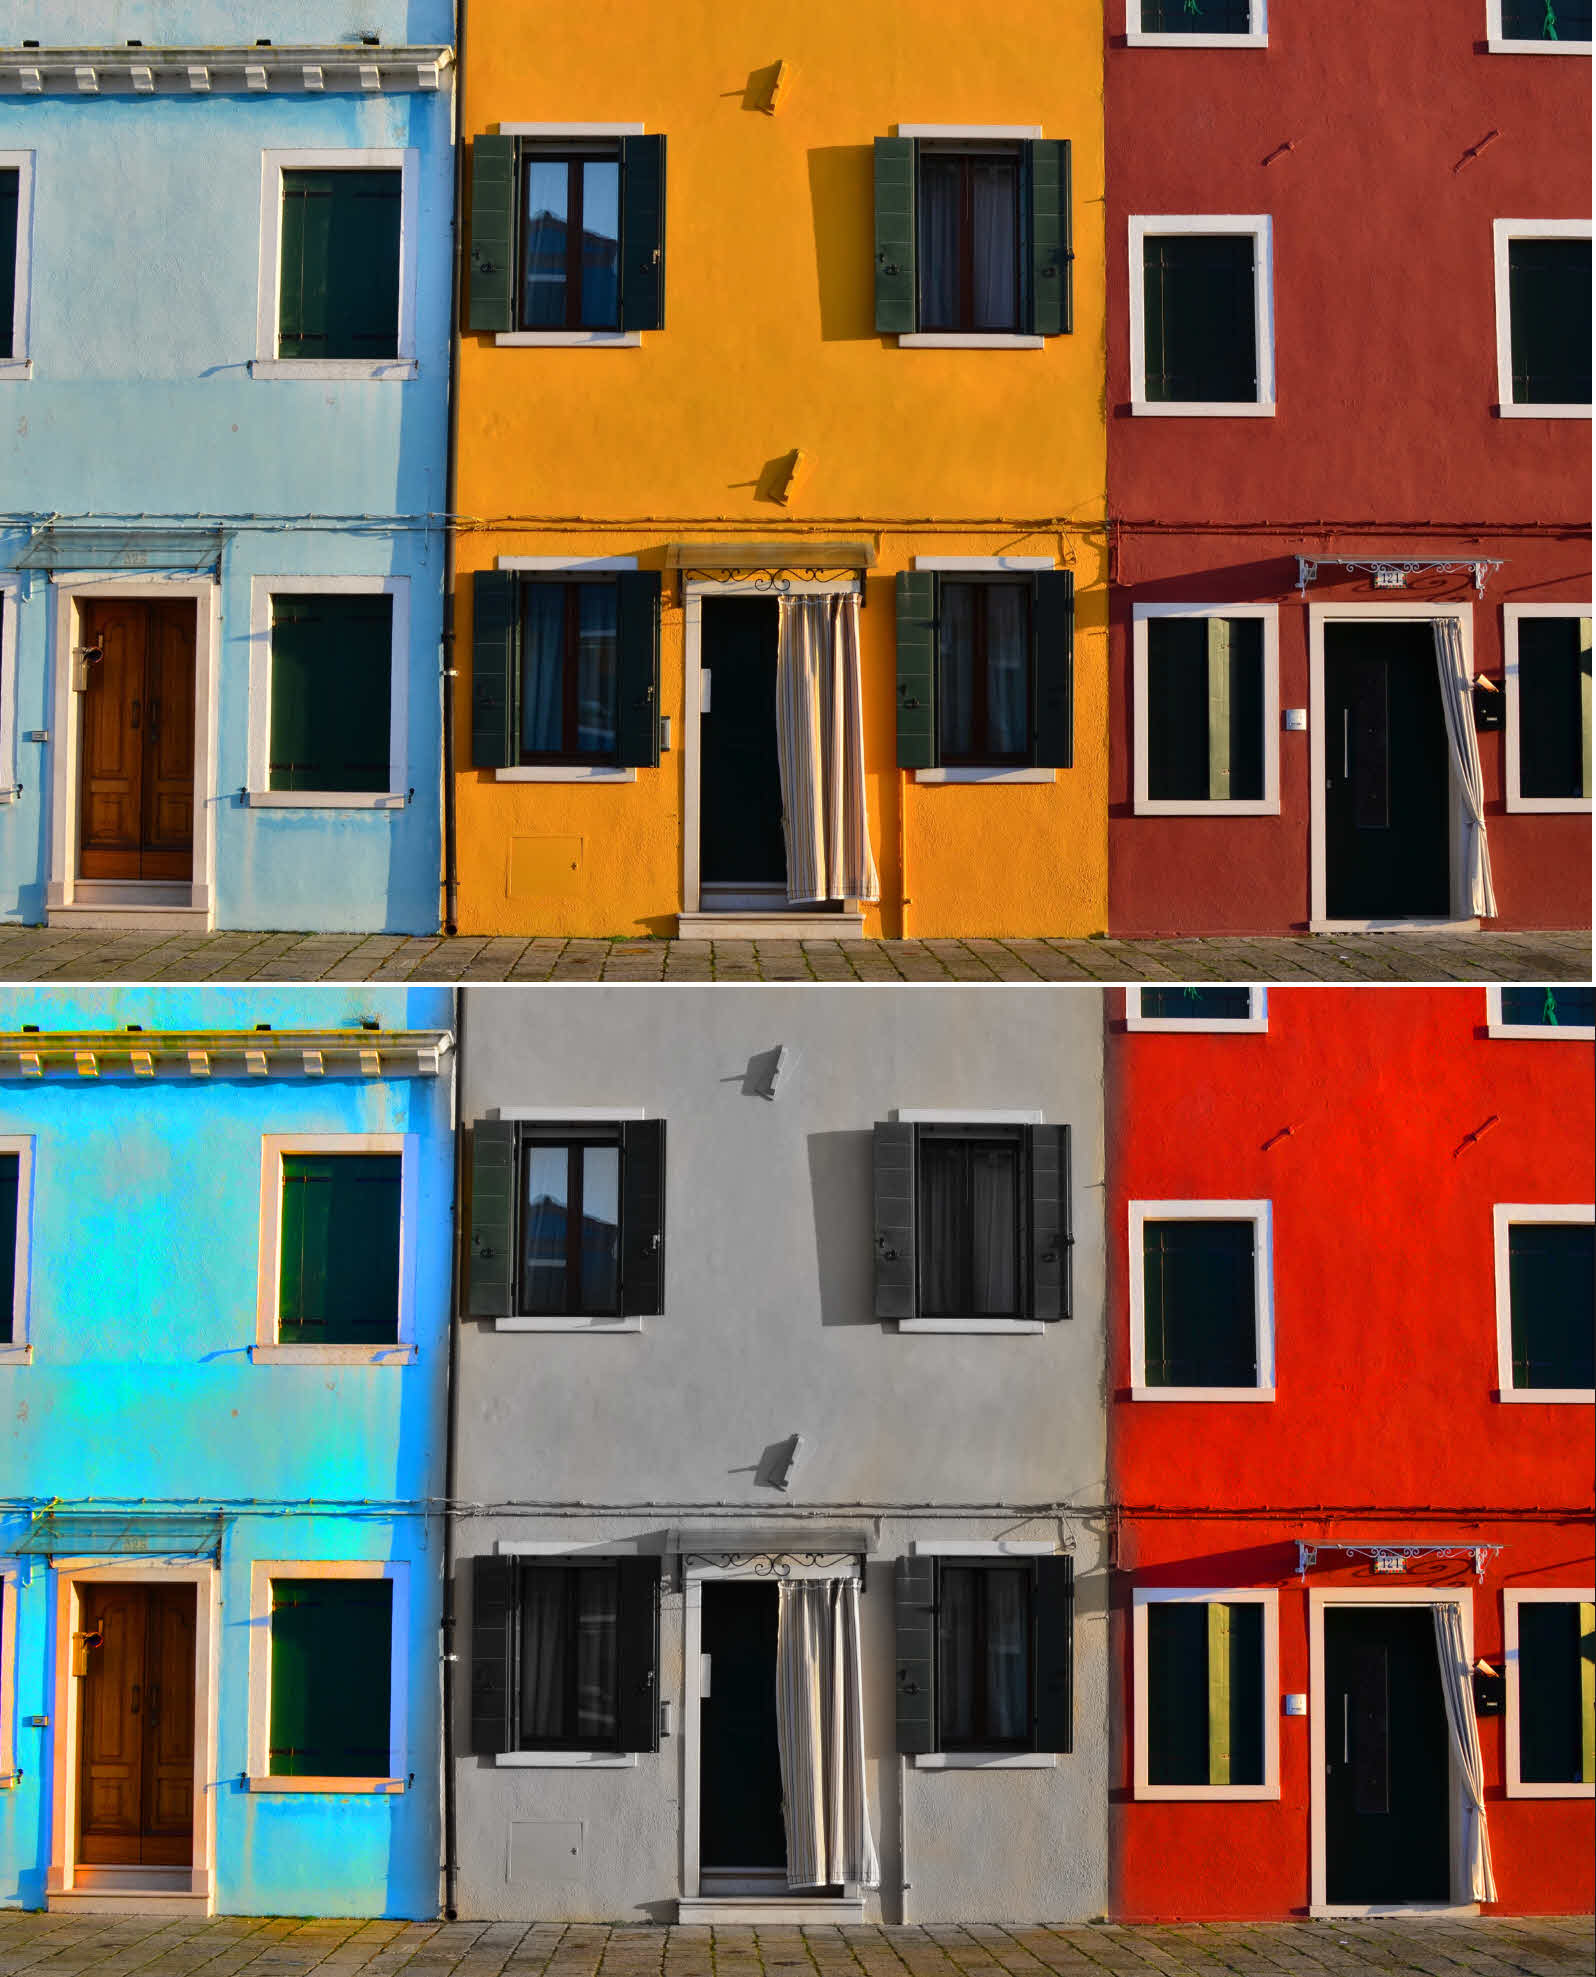
5. Make sure you’ve selected the duplicate layer, then drag the Sponge tool in a painting motion so that you are painting on top of an area of the image. I’m painting over the orange-red building. The more you paint over an area, the more saturated the colour becomes. In the image I’m using, I’ve painted only over the red building and it’s starting to look much more colourful. See below.
If you keep painting over the same area, you’ll see that the colours become over saturated and the colours start to look strange. It looks unnatural now - but that’s ok for demonstration purposes 🙂 Press Cmd + Option + Z (Mac) or Ctrl + Alt + Z to step back and undo if you have gone too far with your saturation.
Keep painting until you’ve saturated the whole of the red building. If you want to, paint on the blue building too. This is how my image looked after I used the Sponge Tool set to saturation on the blue and red buildings.
Ok, so let’s say you want to suck some colour of a photo. We stick with the Sponge Tool but make a simple but important change to one of the options in the Tools Options bar at the top.
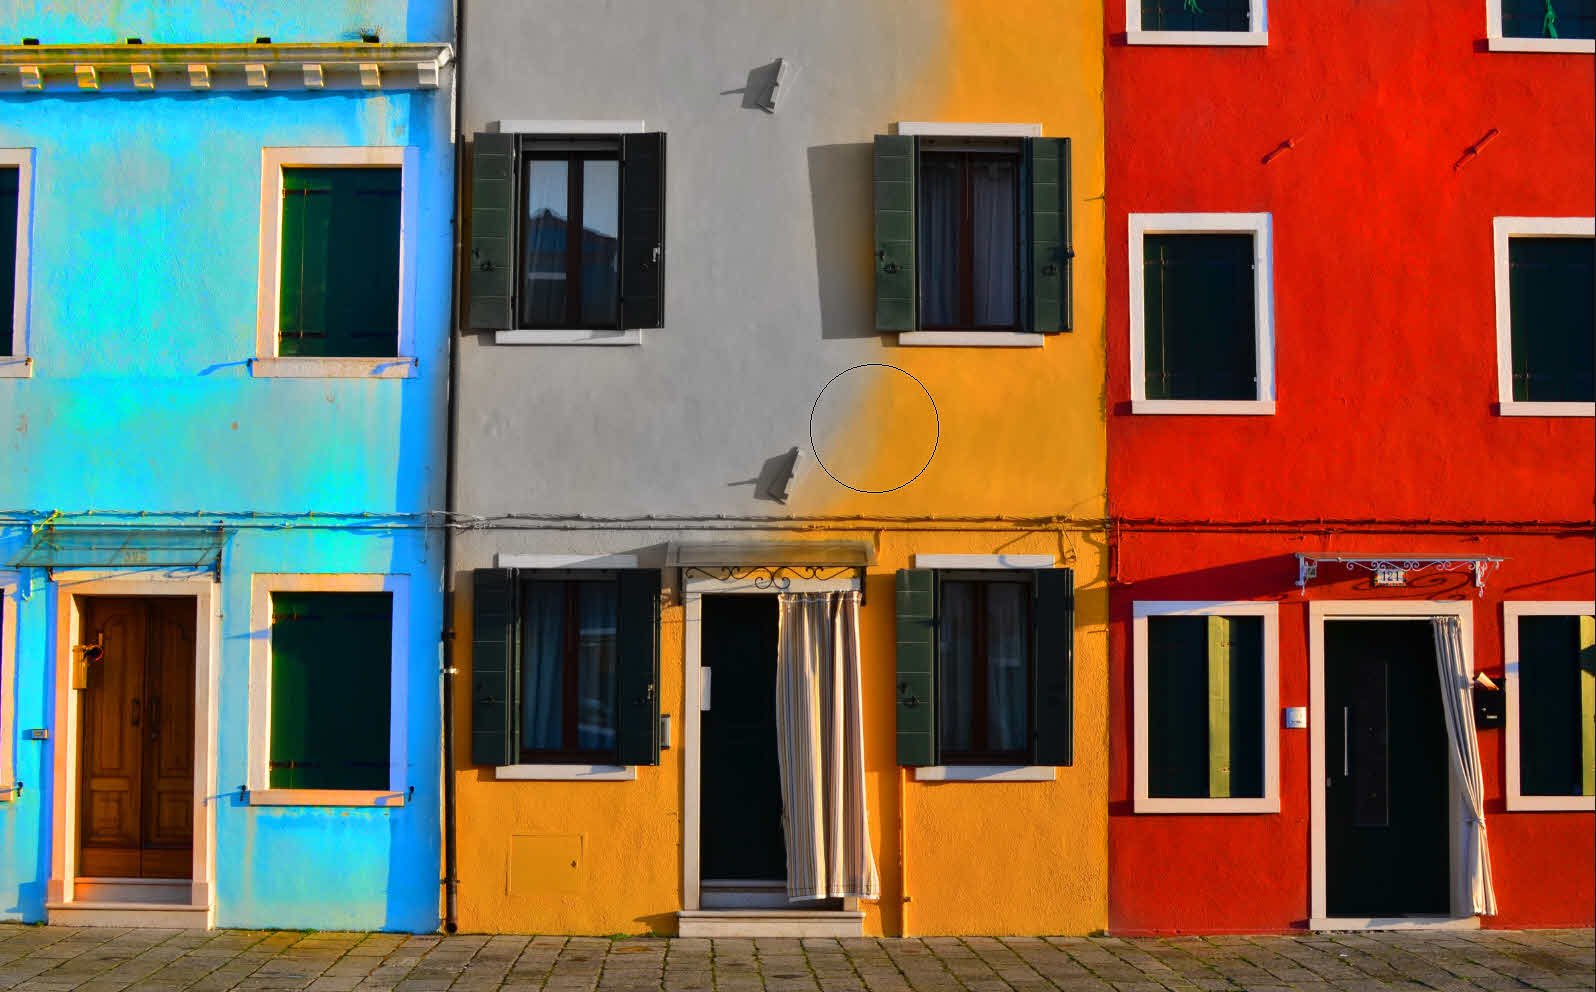
1. Just set the mode to Desaturate in the tool options bar.
![]()
2. Paint over the area that you want to remove colour from. In this case, I’m painting over the yellow building in the middle. The more I paint over the same area, the more grey it becomes.
3. To compare the before and after work you’ve done with the Sponge tool, toggle on and off the visibility of your duplicate layer. Your original layer should be untouched underneath.
As is often the case, this is NOT the ONLY way to add and subtract color in Photoshop. There are several techniques we can use, but the Sponge Tool provides a fun quick fix when editing images. Just remember to make a duplicate layer so that you don’t “hurt” your original image.
I hope you found this short article on the Sponge Tool useful. Please share it using the sharing tools. Thanks!