
Learn how to use a gradient layer mask in Photoshop to combine two layers and create a cool effect. This short step by step Photoshop tutorial shows you firstly how to use a filter to create a graphic pen effect, and then combine it with a colour photograph by using a layer mask.
Layer Masks In Photoshop
Photoshop layer masks are an essential tool for photographers and designers who want to combine images or apply interesting effects to a photograph without damaging it. You can add a mask to a layer to hide parts of the layer, revealing parts of the layer below. You can also use a mask to hide an entire layer, and then paint on the mask so that small portions of that layer back in.
Mostly when you’re working with layer masks, you paint using either black or white. Painting in black on a white mask reveals the layer underneath. I’m going to show you how to add a mask to an image and apply a gradient to that mask. The gradient will move from black to dark grey to mid-grey to light grey to white. The gradient will be very smooth and this creates a very cool effect where the layer below is gradually revealed. Before we apply the gradient, we’ll change a copy of the image using a filter. So let’s get started.
1. Open an image, I’m using this bright pink photo of a child, who looks like he’s had an electric shock!.
2. Press Ctrl + J (Windows) or Cmd + J (Mac) to duplicate the layer.
3. Give the new layer a descriptive name (I called mine “Graphic Pen Filter”). To change the layer name, just double-click on the name in the Layers panel.
4. Make sure the Graphic Pen Filter layer is selected, then choose Filter > Filter Gallery > Sketch. Then click on the icon for Graphic Pen. On the right-hand side of the Filter Gallery, you can choose settings for any Filter that you want to apply. In this case, I set the Stroke Length to 15, the Light/Dark Balance to 65 and the Stroke Direction to Left Diagonal. But you can pick whatever settings you like. In the preview pane, you will see that your image is already looking very different. Click OK.
Now that the filter has been applied to the top layer, we’re going to add a layer mask.
5. Choose Layer > Layer Mask > Reveal All.
In the layer palette you will see the thumbnail of the contents of your layer and a thumbnail of a white square. In between the two thumbnails you’ll see a link icon. This tells us that the layer mask is linked to the image. That means if you move the contents of the layer, the layer mask will move with it.
6. Press D to set the foreground and background colours to their default of white and black.
7. Select the Gradient tool from the toolbar.
8. In the tool options bar, at the top of the screen, make sure that the selected gradient is the first one in the drop down box, i.e. Foreground to Background.
If this is not the gradient option you see. Click on the gradient bar to open the Gradient Editor, and choose Foreground to Background.
9. This is VERY IMPORTANT. Make sure to click on the white layer mask thumbnail in the Layers panel. We need to make sure that we are applying the gradient to the mask and not to the actual content of the layer.
10. Drag the gradient from the top left corner of the image to the middle of the image and release the mouse. You should see something like this:
Looks pretty cool. Where the mask is now black we can see straight through to the layer underneath. Where the mask is white, we see what is on the current layer, and as the gradient moves through the greys, we can see varying amounts of the layer underneath, until it is completely hidden by the top layer.
You can drag out your gradient in a layer mask, again and again, to try out different combinations and get the image exactly the way you want.
I hope you found this useful. I would be super grateful if you would share it! Thank you 🙂
Pin It!
Get A Free Giant Photoshop CC Tool Cheat Sheet
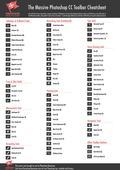
Sign up for my Photoshop newsletter and get a free, instantly downloadable PDF poster of the Photoshop CC Toolbar Cheat Sheet. It has all the tool icons and all the shortcuts you need to know to speed up your Photoshop workflow.
Jennifer Farley is an illustrator, designer, author and design teacher based in Ireland. She has been teaching design for over 14 years and helps people learn Adobe Photoshop, Lightroom, Illustrator and graphic design skills to improve their job prospects and their business.