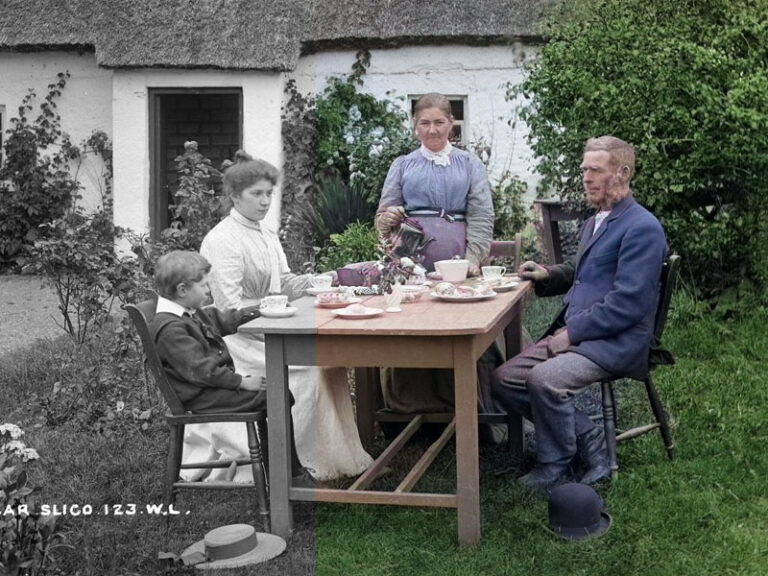
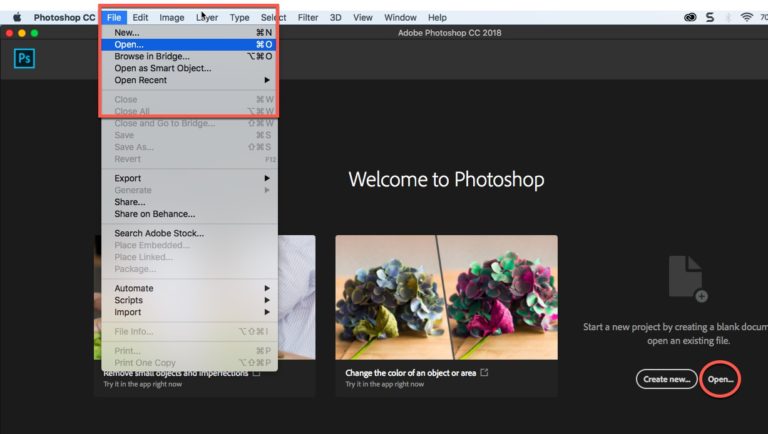
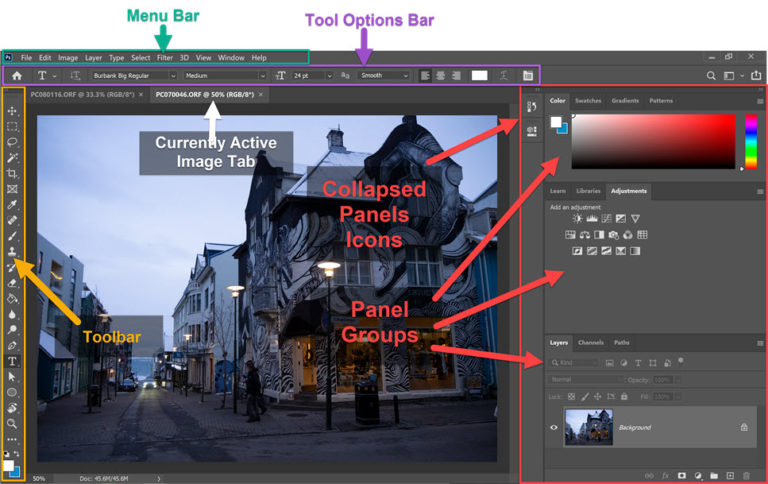
Beginners Guide To The Photoshop Workspace

If you want to learn Photoshop, the best place to start is to get to know the Photoshop workspace or interface. Photoshop is jam-packed with tools, panels, menus and options.

It is no wonder then, that many people feel overwhelmed when they are getting started. This guide shows you where everything is with links to more in-depth tutorials on tools and panels.

The Photoshop interface and workspace hasn’t changed much between versions. So even if you have an older or newer version of Photoshop, this is all still relevant.

Download a free Photoshop trial

Some of the links in this post are affiliate links. This means if you click on the link and purchase the item, I will receive an affiliate commission at no extra cost to you. All opinions remain my own.

Meet the Photoshop Workspace

To get started open ANY image in Photoshop by choosing File > Open and pick any image you want from your computer or hard drive.

Photoshop Workspace with Menu Bar, Tool Options Bar, Toolbar and Panel Groups

When you open Photoshop, it should look a little bit like the screengrab above. Yours might look slightly different, but it should be fairly similar.

Your opened image sits in the document window and you can open multiple images in Photoshop at one time. In the example above, I have two images open and I move between them by clicking on the name tab.

The menu bar always sits at the top of the screen. There are 11 menus with many options underneath each.

Click on each menu item to see what’s available. You’ll notice some options are greyed out which means they are not currently available.

In the example here, you can see the contents of the Filter menu. This has several sub-menu items – 3D, Blur, Distort and Sharpen to name a few. Each one of those items has its own sub-menu.

As you can see there are many commands available under the menu bar.

Photoshop Filter Menu Options

Photoshop Toolbar

The toolbar sits on the left-hand side of the workspace and it holds the tools we use to create, edit, manipulate our images.

We can move it freely around and can view it as a long, skinny, single-column toolbar, or as a wider, shorter, double-column toolbar.

Click here to read more about how to use Photoshop tools.

Photoshop Toolbar Double Column With Type Tool Selected

Tool Options Bar

Photoshop Tool Options Bar

As the name suggests, this bar gives us options or settings that we can apply to whichever tool we are currently using.

The options are context-sensitive, so for example, if you are using the Type tool the options which appear in this bar will be exclusive to Type. If you are using the Paintbrush tool, you will see options only for controlling the Paintbrush.

Photoshop Panels

Panels sit on the right-hand side of the screen, and like the toolbar, they can be dragged out and moved freely around the workspace. They provide lots of extra functionality.

Click here to read more about how to use Photoshop Panels and how to customise your workspace.

Photoshop Panels

That’s a brief overview of the Photoshop workspace.

(If you want to know more about buying a subscription for Photoshop, check out this post where I explain the different plans and how to get the best deal on Photoshop.)

Jennifer Farley

Jennifer Farley

Hello!

My name is Jennifer Farley. I'm an Irish author, illustrator, designer, and design educator. I've been teaching and working in the design field for over 20 years. I help people learn Adobe Photoshop, Lightroom, Illustrator and Graphic Design.

Photoshop Bootcamp is a growing collection of my Photoshop tutorials and lessons I've written for my students.

Leave a Reply

Your email address will not be published. Required fields are marked *

This site uses Akismet to reduce spam. Learn how your comment data is processed.