Physical Address
304 North Cardinal St.
Dorchester Center, MA 02124
Physical Address
304 North Cardinal St.
Dorchester Center, MA 02124
Last Updated on October 22, 2022
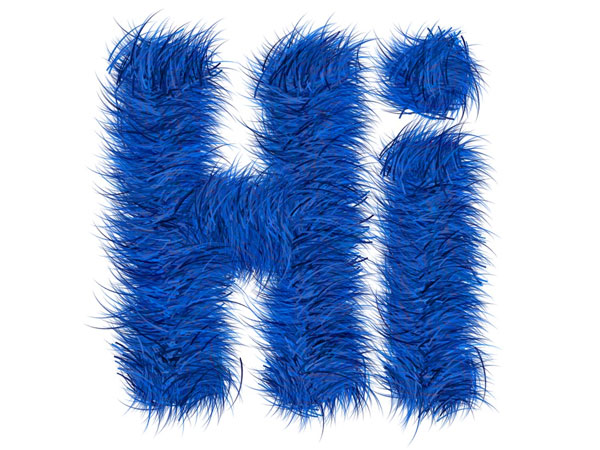
In this short tutorial, you’ll see how to create a fun fur effect in Photoshop.
The idea here is to create some text that looks like it is covered in fur. You could add this effect to any shape.
The only tools you’ll need are the Type tool and the Brush tool. If you’re a beginner, you may find it useful to take a look at this tutorial on how to add text to an image in Photoshop.
Click Here To Download Photoshop Free 7 Day Trial
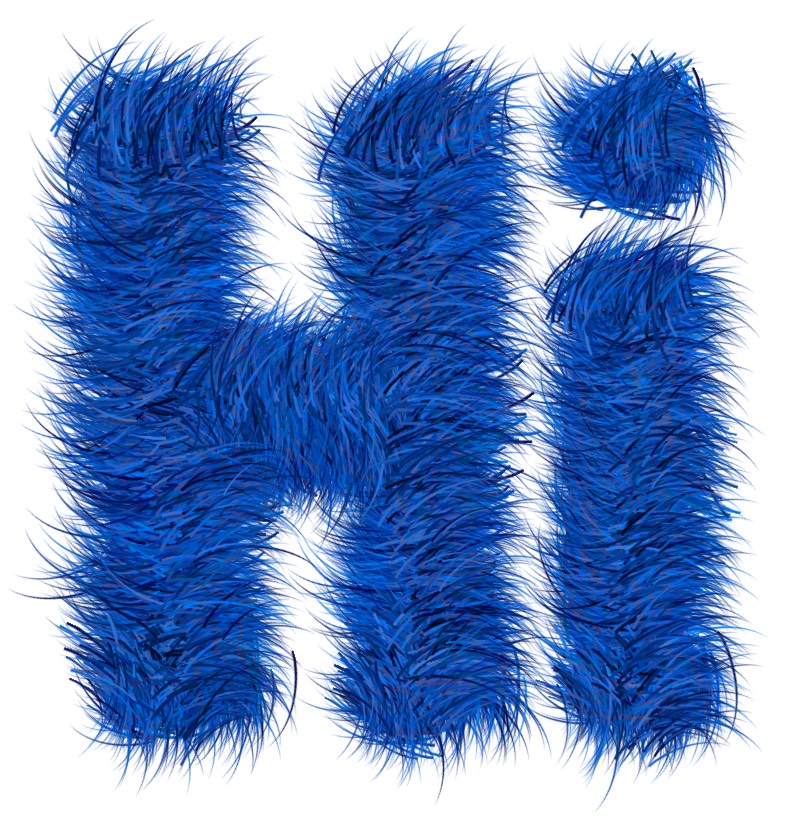
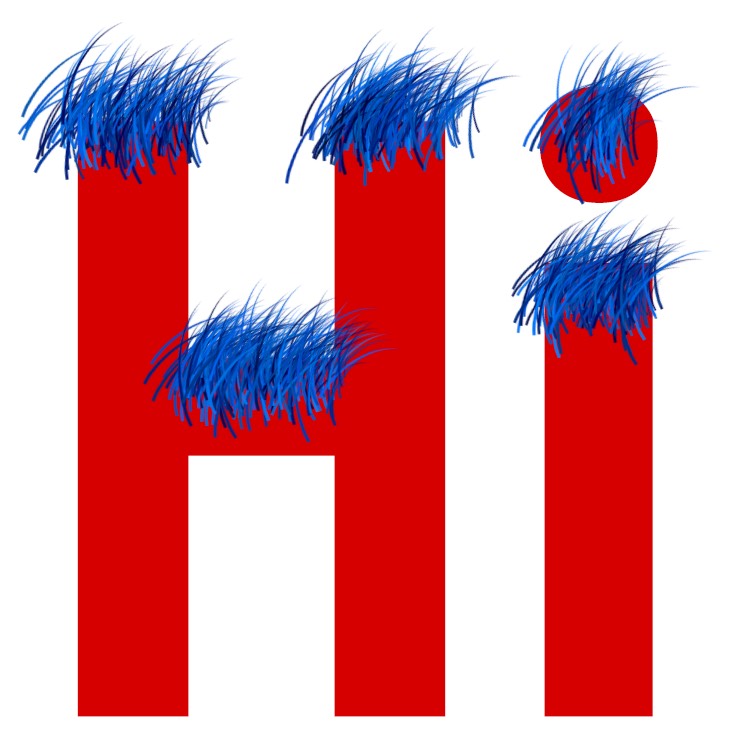
Here’s what we’ll make.
1. Create a new document and let’s say that this is going to be used in a printed document, so set the dpi to 300 and the dimensions to 1000 pixels wide by 1000 pixels high.
2. Select the Type Tool (T) and in the Options Bar at the top of the screen, set up your type.

I’m using Open Sans Condensed Bold. This is a free font that you can download from Google Fonts. However, this effect will work well with any heavy, bold font.
The colour you choose at this point doesn’t matter because we’ll be hiding this text at the end.
I set the font size to 200 points.
3. Add some text to your document.

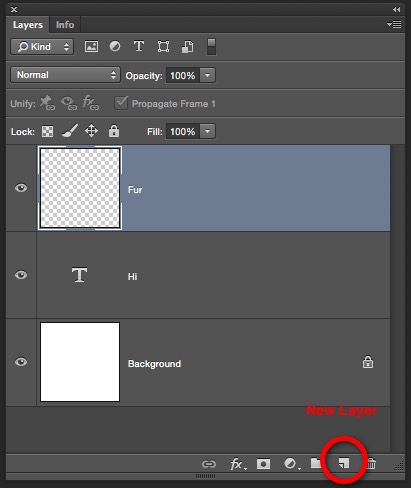
4. Create a new layer above your text layer and name it Fur.
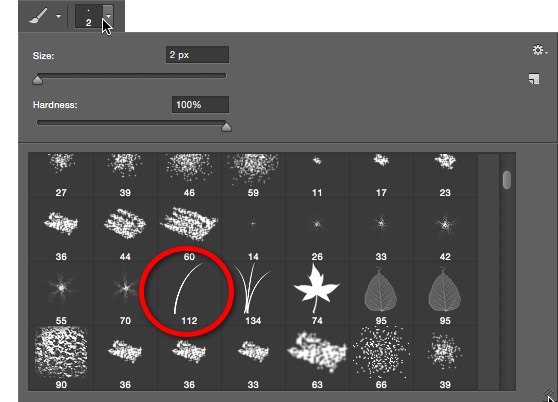
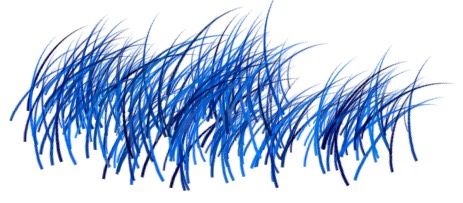
5. Select the Brush Tool (B) and in the Options bar at the top, click on the drop-down brushes menu and choose the Dune Grass brush.
5. The dune grass brush works by “scattering” the dune grass as you paint and varies the colour of each blade of grass, based on the foreground and background colours.
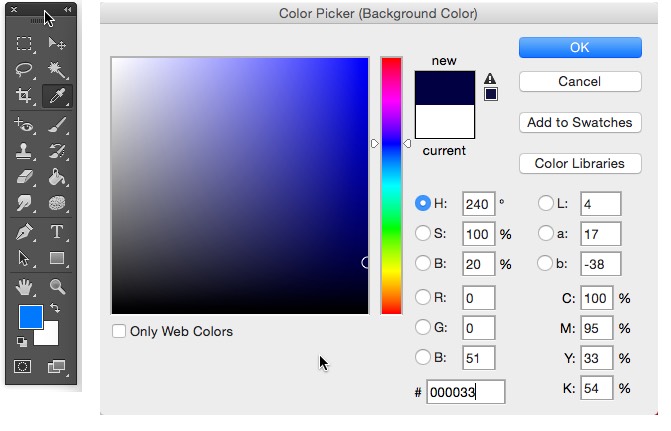
Select your foreground and background colours to be in a similar hue, for example, light blue and dark blue. Click once on the foreground colour swatch to open up the colour picker.
I used a foreground colour of #0066FF and a background colour of #000033.
6. Have a little bit of practice by dragging the brush near the letter so you can get a feel for how the brush works.
You’ll see that by dragging backwards and forwards there is a build-up of dune grass and that the colours are varying between royal blue and dark navy, as we set up in our colour picker earlier.
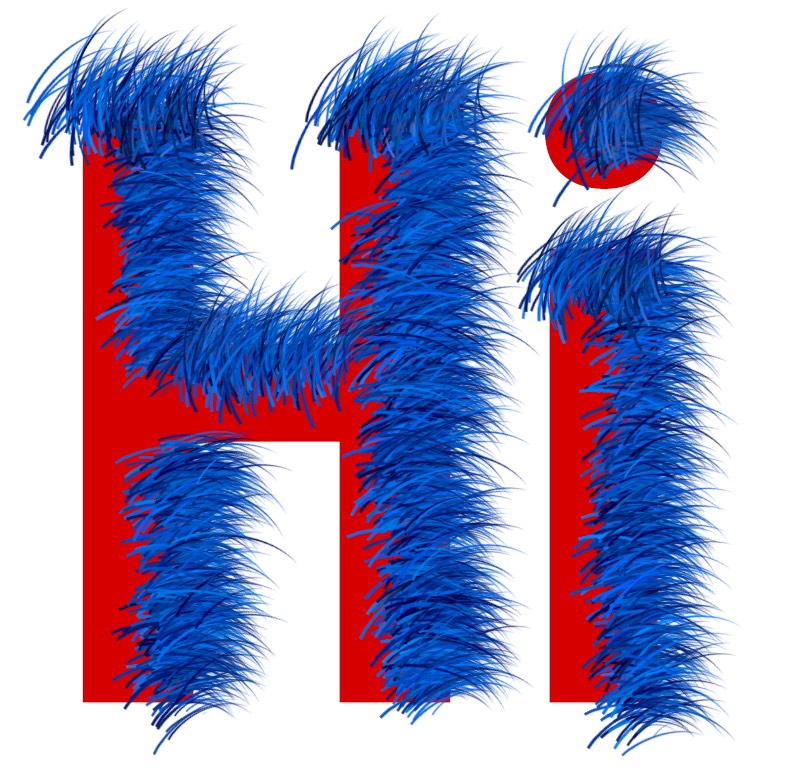
7. Ok now that you have a feel for the brush, start to drag it around the letter. I’ve started at the top.
See! It looks cute already.
8. There are two choices now, either to rotate the canvas around using the Rotate Canvas Tool (H) and keep working around the letter or to rotate the brush.
We’re going to rotate the brush because I want to show you some of the options available in the Brushes panel.
Open the brushes panel by choosing Window > Brushes or hit F5. Click on the words “Brush Tip Shape” (yes this is a button!) at the top left of the brushes panel.
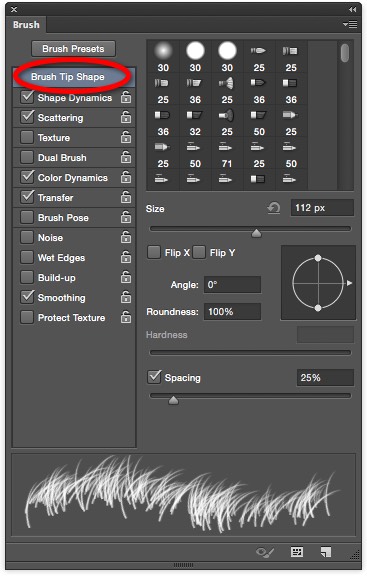
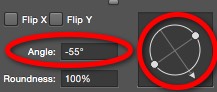
9. On the “Set Brush Direction” preview, click and drag the arrow and you will see the dune grass change direction. Either drag the arrow until the Angle reads about 55, or simply type 55 into the Angle field.
Now paint along the vertical parts of the letters on their right side. Paint back and forward continuously to get a good build-up of “fur”.
 10. Back in the Brushes panel, change the angle again so it is about -135. The dune grass will now look like it’s facing downwards.
Paint along the bottom sides of the letters, again building up lots of fur and overlapping with the fur you’ve already painted in.

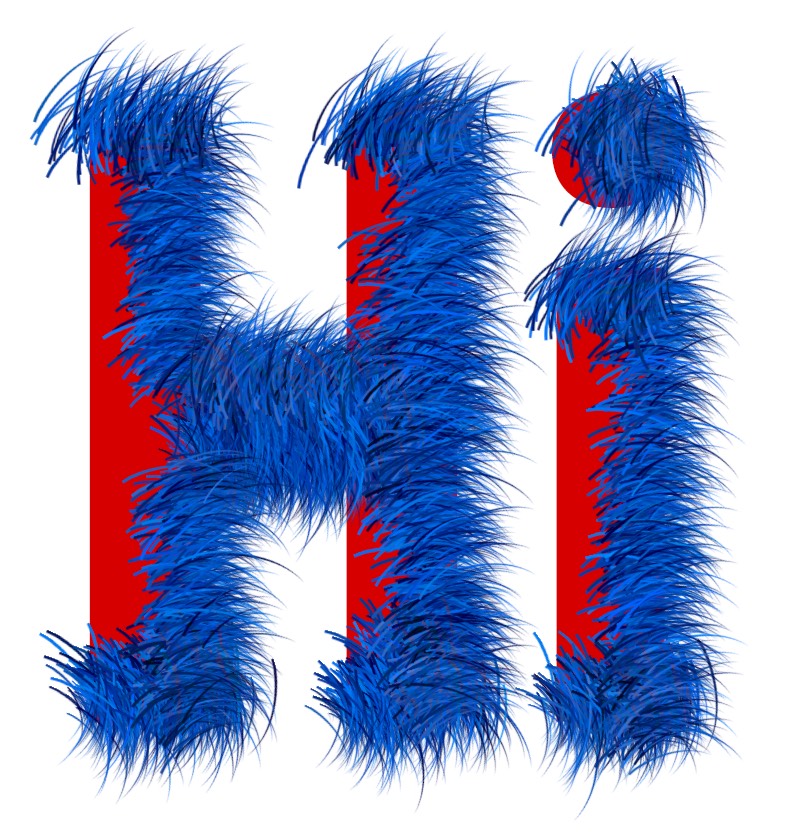
11. Back to the Brushes panel one last time. Change the angle to about 110 degrees. Keep on painting with the brush, along the left side of the letters.
Paint the inside of the letter until it is completely covered and you end up with two nice furry letters something like this;
12. The final step is to turn off the visibility on your original text layer, which should be invisible anyway as it’s covered in fur. And that’s it! Hope you enjoyed making a fur effect in Photoshop.
I hope you’ve found this Photoshop tutorial useful and I would be really grateful if you would share it. Thank you so much! 🙂
Pin This!