
Last Updated on October 28, 2022
In this short Photoshop tutorial, you’ll see how easy it is to colorize a black and white photo using the Colorize filter. I’ll explain how the settings in the filter work as we go.
The Colorize filter is one of Photoshop’s Neural Filters. It uses artificial intelligence (known as Adobe Sensei) and machine learning to choose colours. Initial results are often very good, but if you don’t think it looks correct, you can choose your own colours.
You’ll need Photoshop 2021 or newer. If you don’t have a copy of the latest version already, you can download a free Photoshop trial here.
Ok, let’s get started!
Step 1. Start With A Black and White Image
In Photoshop, open a black-and-white photograph.
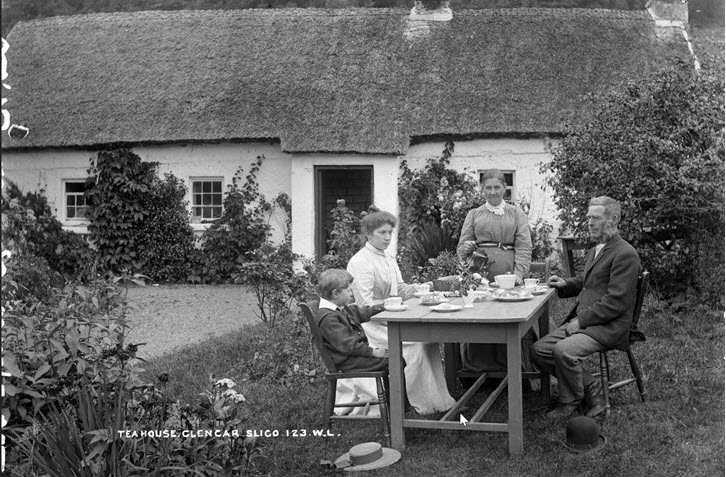
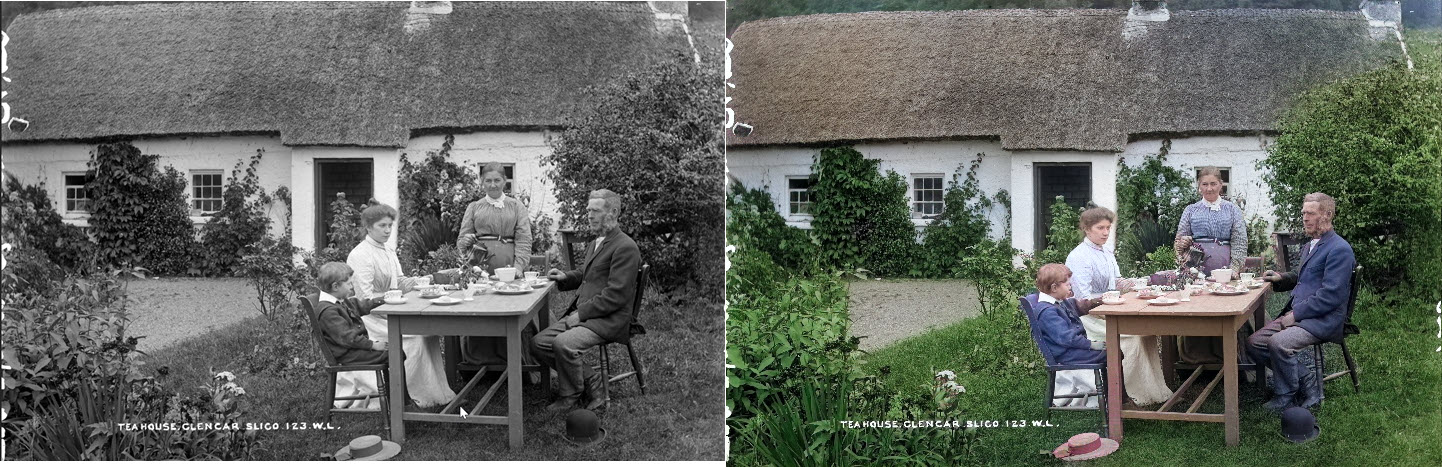
I chose a vintage picture from Wikimedia Commons of a scene from rural Ireland. You can download it here if you want to use the same one.
Your photo does not have to be completely black and white, you could also use one that has a sepia tint.
Step 2. Make Sure It’s RGB Mode
Even though your image is in black and white, it’s important that it is in RGB mode, otherwise, you can’t use the Colorize Neural filter.
To ensure your image is RGB, on the main Photoshop menu choose Image > Mode > RGB. If your image is already in RGB mode you will see a checkmark beside it, otherwise, click on RGB to select it.
Step 3. Choose The Colorize Neural Filter
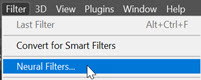
From the main Photoshop menu at the top of the screen, choose Filter > Neural Filters.
A new panel opens on the right-hand side of the screen and you’ll see a list of all the Neural Filters available.
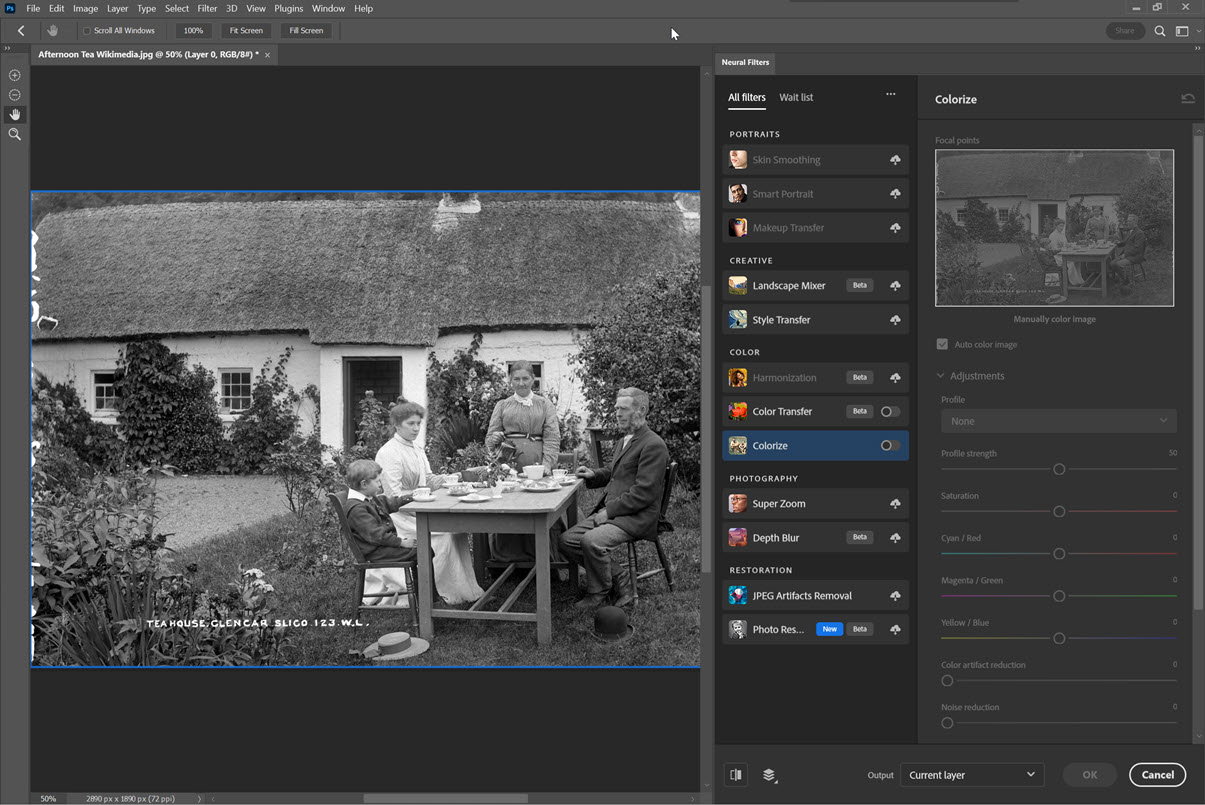
If you haven’t used the Colorize Filter before, you will need to download it. Just click on the little cloud icon to the right of the word Colorize to download the filter.
Step 4. Turn On The Filter
Once the filter is downloaded, you can enable it by clicking on the small circle button beside the filter name.
With this one click, Photoshop will assign colours to your image using AI. The process is very quick.
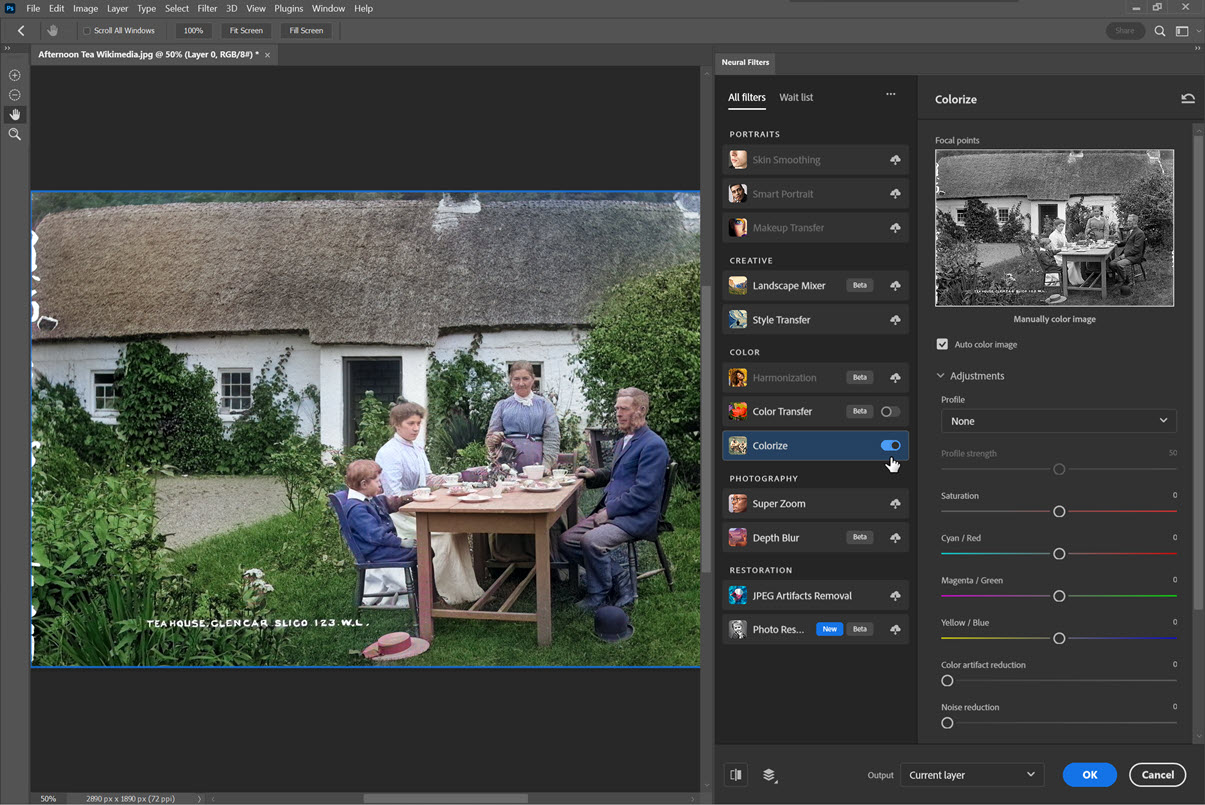
Having tested this out with lots of old black-and-white photos, I’ve found this to work amazingly well. In fact, it works jaw-droppingly well.
Step 5. Adjusting Colours (optional)
If you would like to adjust the colors a bit more to your liking, there are a couple of Adjustments options you can work with.
The first is the Profile dropdown menu.
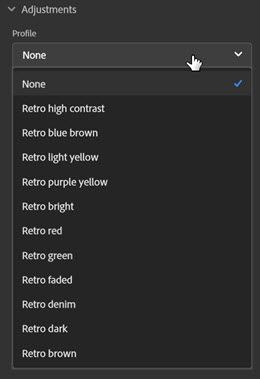
There are eleven Profile presets to choose from. These profiles will adjust colours and saturation. The best thing to do here is simply going through each option and see how it affects your photograph.
The second set of Adjustments is a group of sliders that allow you to work with specific colours and saturation.
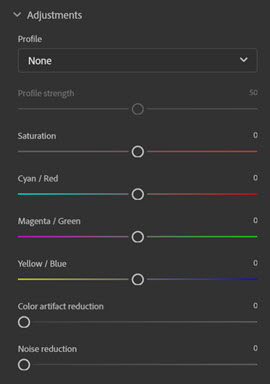
If you feel your image has too much red, drag the Cyan/Red slider to the left to reduce red and increase Cyan, and drag the Magenta/Green slider to the right to reduce magenta and increase green.
This involves some trial and error but you will see the changes happen fairly quickly.
For this particular image that I’m working with, I reduced the Saturation to -10. This decreases the intensity of the colours in the image.
Step 6. Add Focal Points For Extra Colour (Optional)
If you would like to adjust individual colours or add extra colour in a specific part of the image, you can use Focal Points.
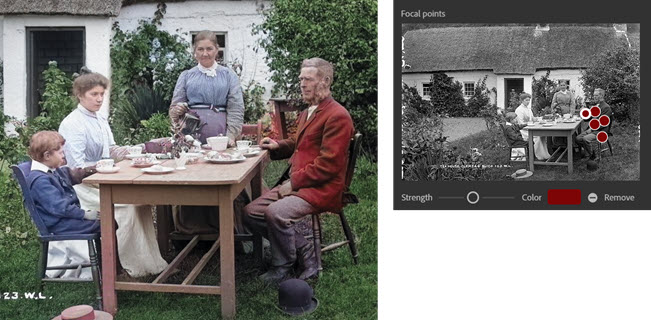
Let’s say I wanted to add more colour to the jacket of the man of the house in this image. We can do that by dropping a pin on that area in the image preview section in the top right of the Neural Filters panel.
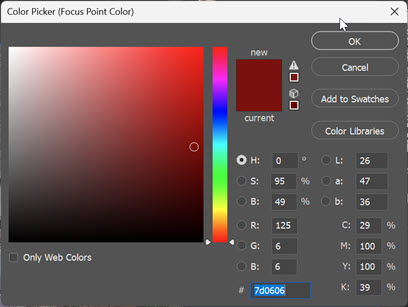
Click on the jacket in the preview. The colour picker appears. Choose the colour you want to add to this area. In my case, I chose dark red #7d0606. Click OK on the Color Picker to see the colour applied.
The coat changes to the colour I chose with the Color Picker and does a good job in maintaining light and dark areas.
Step 7. Add Additional Focal Points For Extra Colour (Optional)
One pin was not enough and appeared uneven, so I added more pins on the sleeves of his jacket and a couple of other places.
Hold Alt/Option and drag an existing point to repeat a color in another part of the image.
He looks very fancy now.
However, to keep the colours in keeping with the rest of the image, I am going to delete the focal point pins and set his jacket back to the previous blue colour.
Step 8. Delete a focal point
If you’ve added too many points or want to remove the extra colour, click on the point you want to remove, and then click on the Remove button (the minus icon) next to the color swatch.

Sometimes you might delete a point by mistake, so to bring it back, simply undo your last step by pressing Ctrl+Z on Windows or Cmd+Z on Mac.
Add Color Artifact or Noise Reduction (Optional)
Under the Color Balance sliders there are two more sliders.
Blotchy color artifacts can be reduced by using color artifact reduction. However, it can also decrease the saturation, especially when set to high. I’ll leave it at 0 because it is having no effect on this image.
Similarly, the Noise Reduction slider tends to just soften the overall image, so I left that at 0 too.
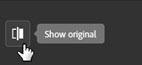
Step 9. Compare Before And After The Filter
To switch between the before and after view, click on the preview mode icon in the lower-left corner of the gallery.
Step 10. Output
When you are happy with how your image looks, choose how you want to output the results.
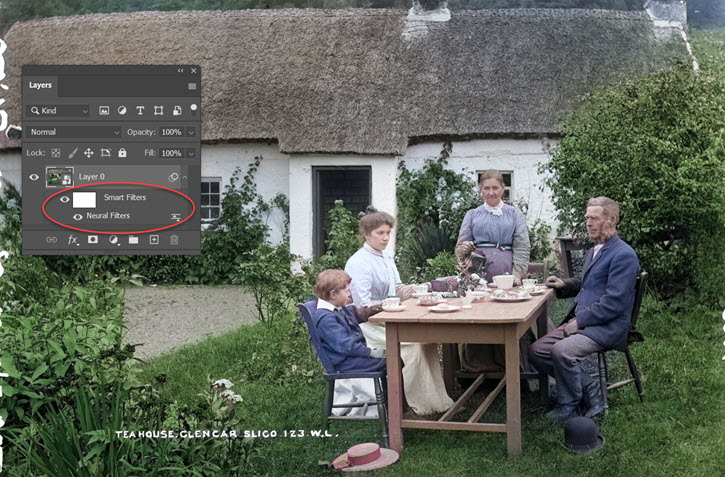
Click on the Output drop-down menu at the bottom of the panel. The options are Current Layer, Duplicate Layer, Duplicate Layer Masked, New Layer, or Smart Filter.
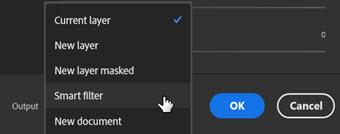
I chose Smart Filter. This means that the coloured image will appear on its own layer above the original image. Because it is a Smart Filter, you can come back and edit your colorization settings anytime by double clicking on the filter in the Layers panel.
If you wanted to do some additional editing after colorisation, you could choose New Layer or New Layer Masked. Then you can do all kinds of editing inside Photoshop.
Click Ok.
And finally, here is the comparison side by side of before and after. That’s how you colorize a black and white image using the Neural Filters in Photoshop.
I hope you enjoyed this Photoshop tutorial. Please share it, thank you!
.jpg)